No guide matches those words. Try fewer words, or see the F.A.Q.
Getting started
Create your free preview website
Tell us about your business in one form. We build a fully designed website and send you a private preview link before you pay anything. The form takes about 10 minutes.
- Open Get started (or New website on your dashboard).
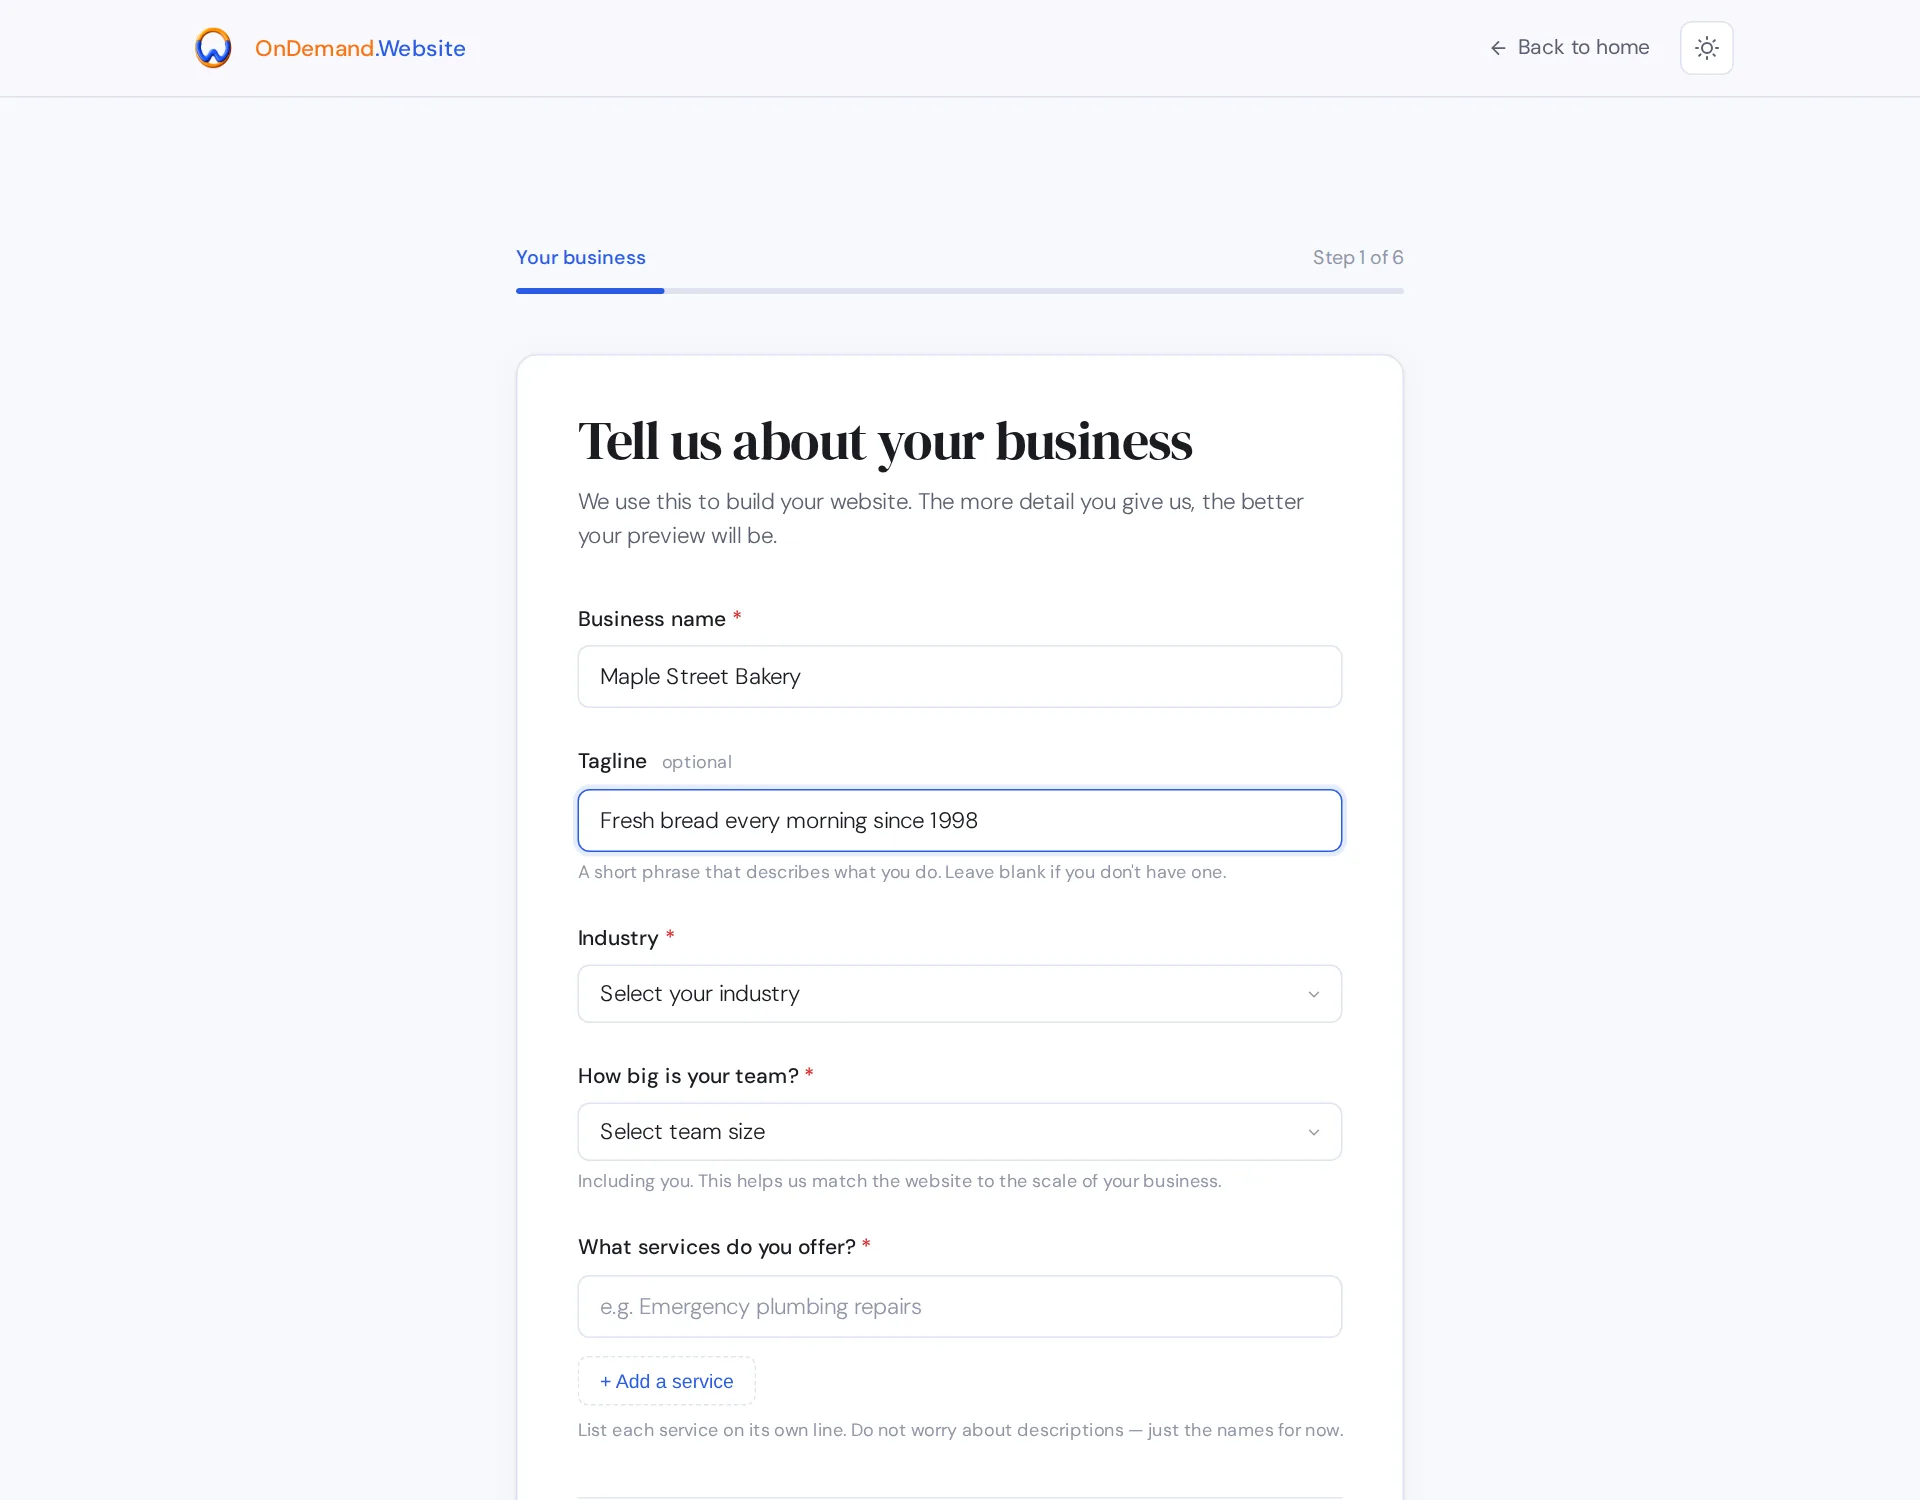
- Your business: business name, tagline, industry, team size and the services you offer (+ Add a service for each one).
- Your customers and goals: who your customers are, the website's languages, how visitors should feel, what you want them to do, and websites you like the look of.
- How your site should look: colours, background, design style, how much content, style and tone, your logo (or tick I do not have a logo yet), photos and documents, and your web address.
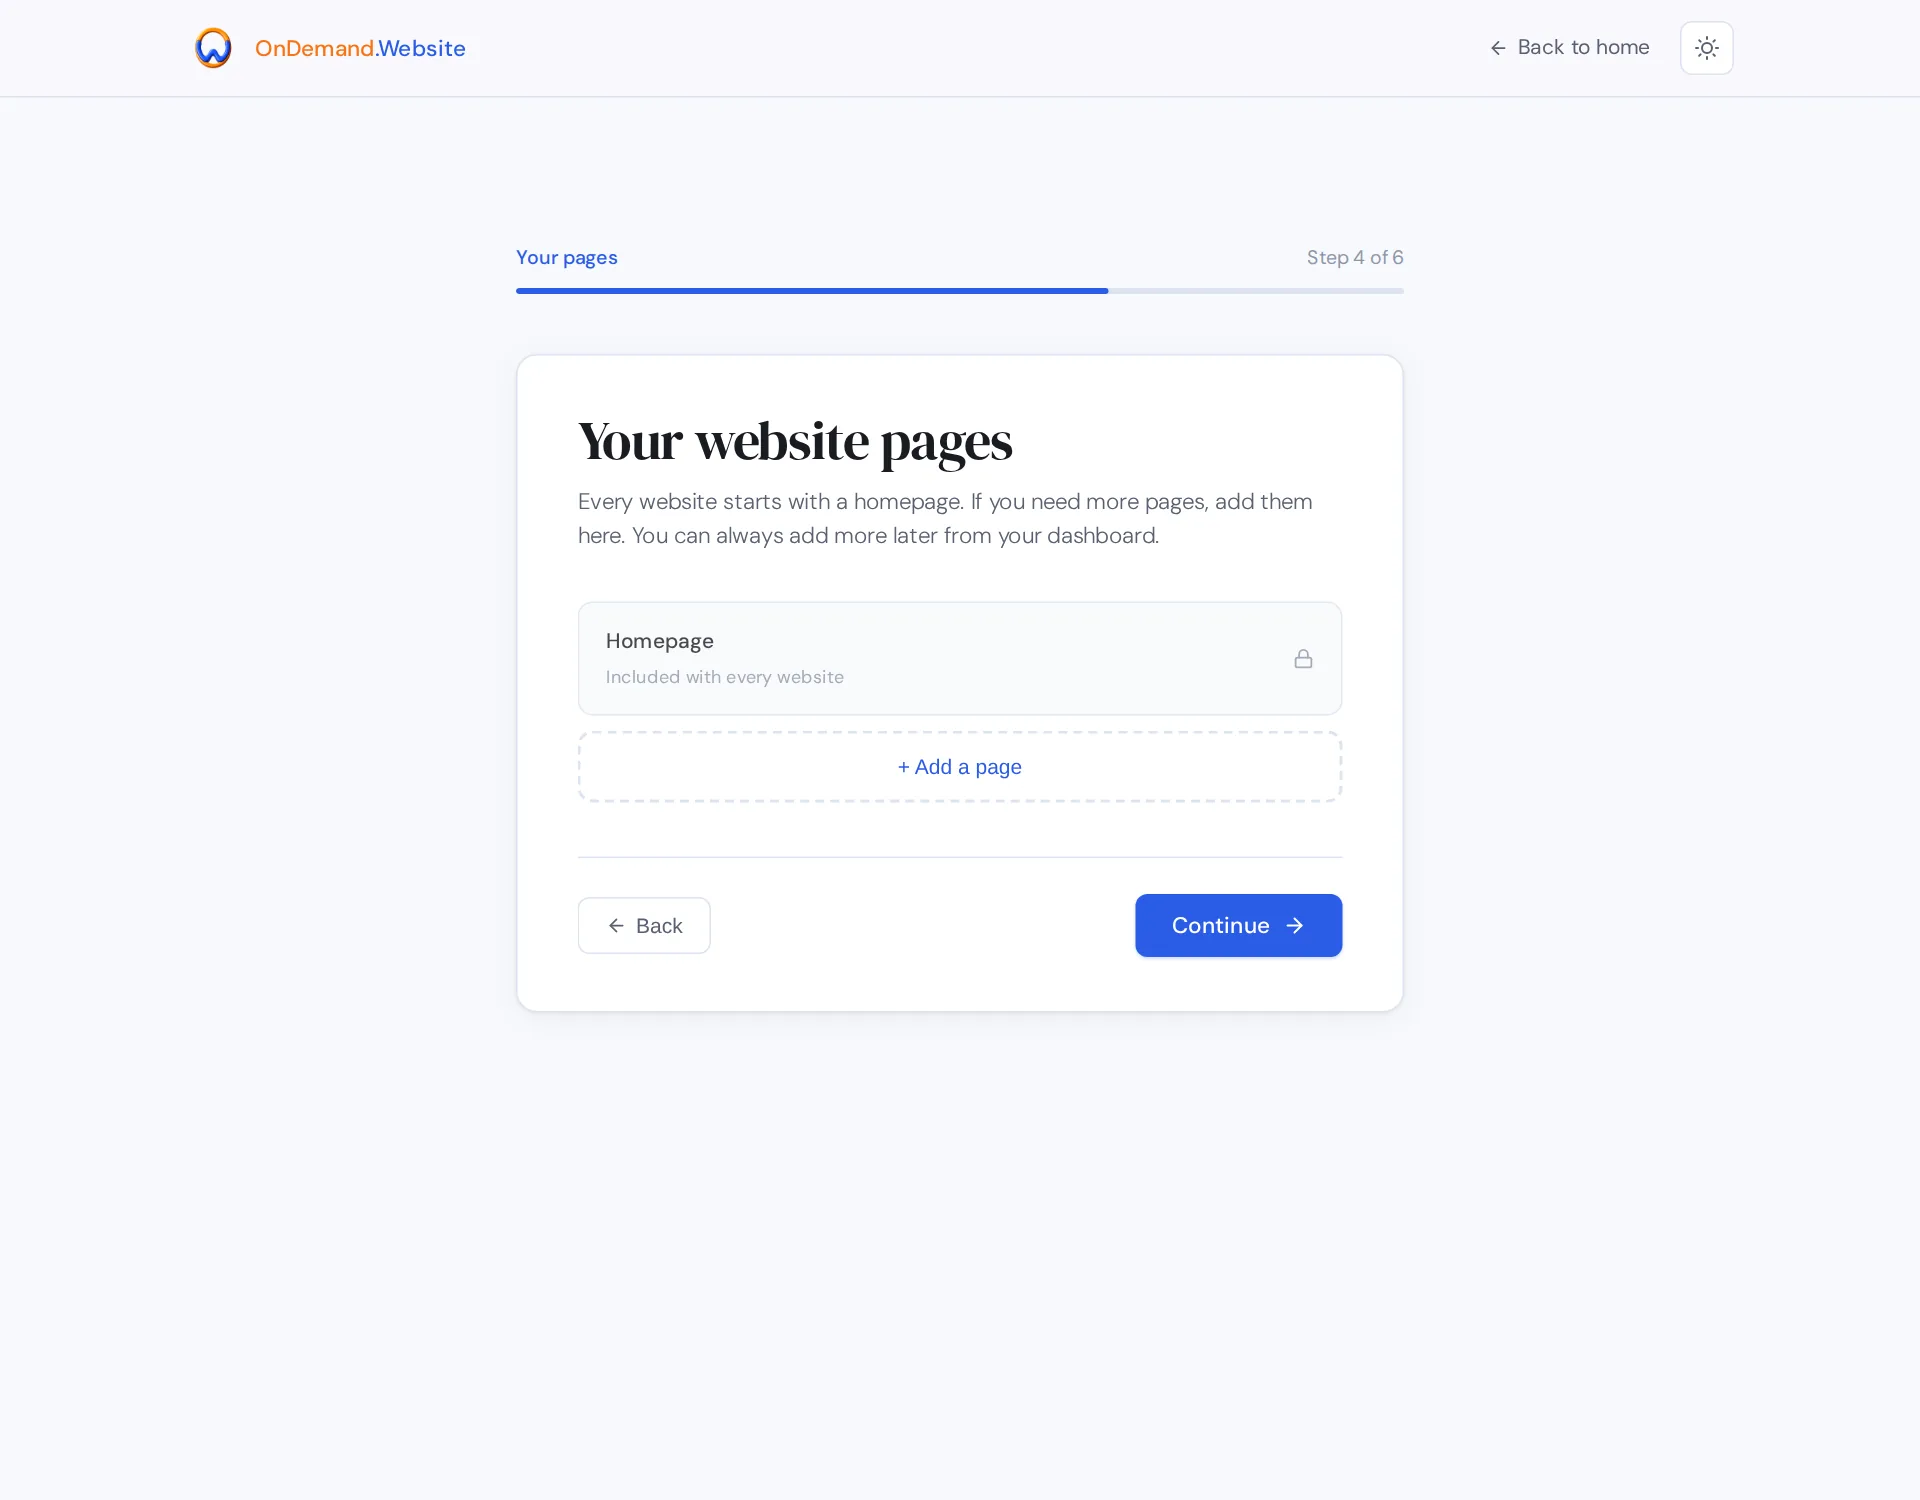
- Your pages: every website has a homepage. Press + Add a page for each extra page and answer its questions (services, about, team, hours and map, gallery, testimonials, questions and answers, menu, booking, or a page of your own).
- Contact details: the name, phone, email and address shown on your website, and your social media and other links.
- Create your account: your account email, phone and password, then Create account. Already signed in? This step is skipped and the form is sent at the end of Contact details.
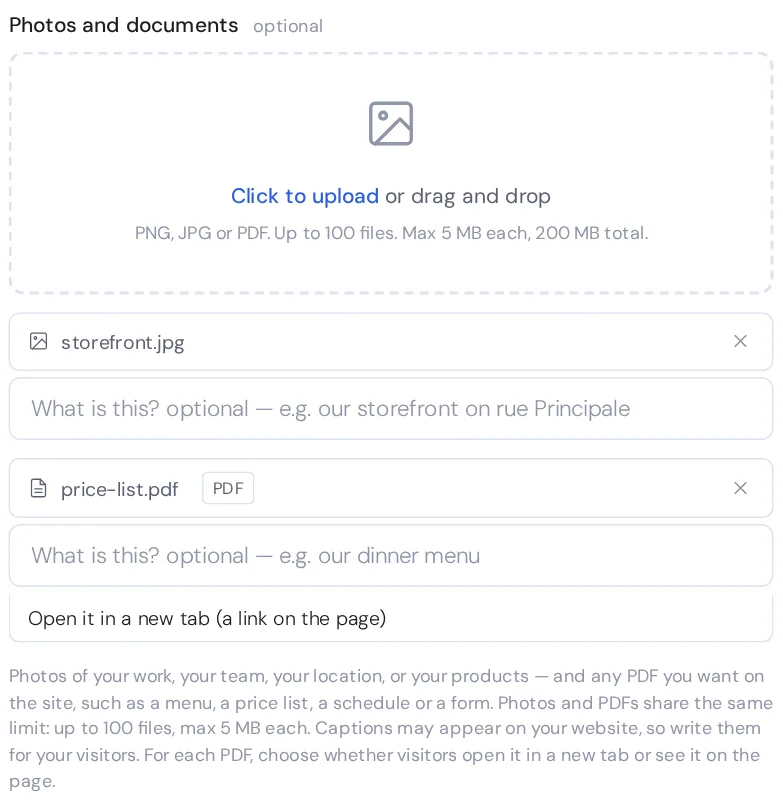
Photos and documents
Upload photos of your work, team, location or products, and any PDF you want on the site, such as a menu, a price list, a schedule or a form. Photos and PDFs share one limit: up to 100 files, 5 MB each, 200 MB in total. Give each file an optional caption (it may appear on your website). For each PDF, choose how visitors see it: Open it in a new tab (a link on the page) or Show it on the page itself. A Menu page can also take its own PDF menu.
Your web address
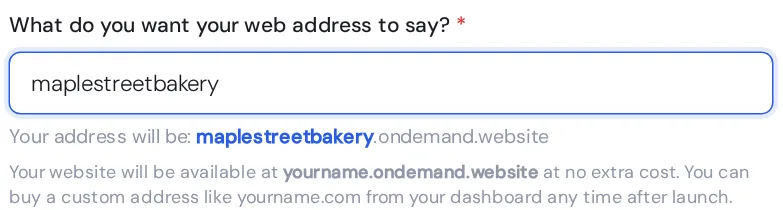
Choose what your free address says: yourname.ondemand.website. You can use your own domain later, when you go live.
What happens next: your website appears under Preview websites as Submitted, then Building. It is usually ready within a few hours, and we email you when it is.
Claim a demo website we made for you
If we built a demo website for your business and emailed you a 6-digit code, claim it to make it yours.
- Open the link in the demo's banner, or sign in and choose Claim a demo website.
- Enter the demo's address (for example
yourbusiness1.ondemand.website) and the 6-digit code from your email. - Press Claim this website and keep the page open; it can take a minute or two.
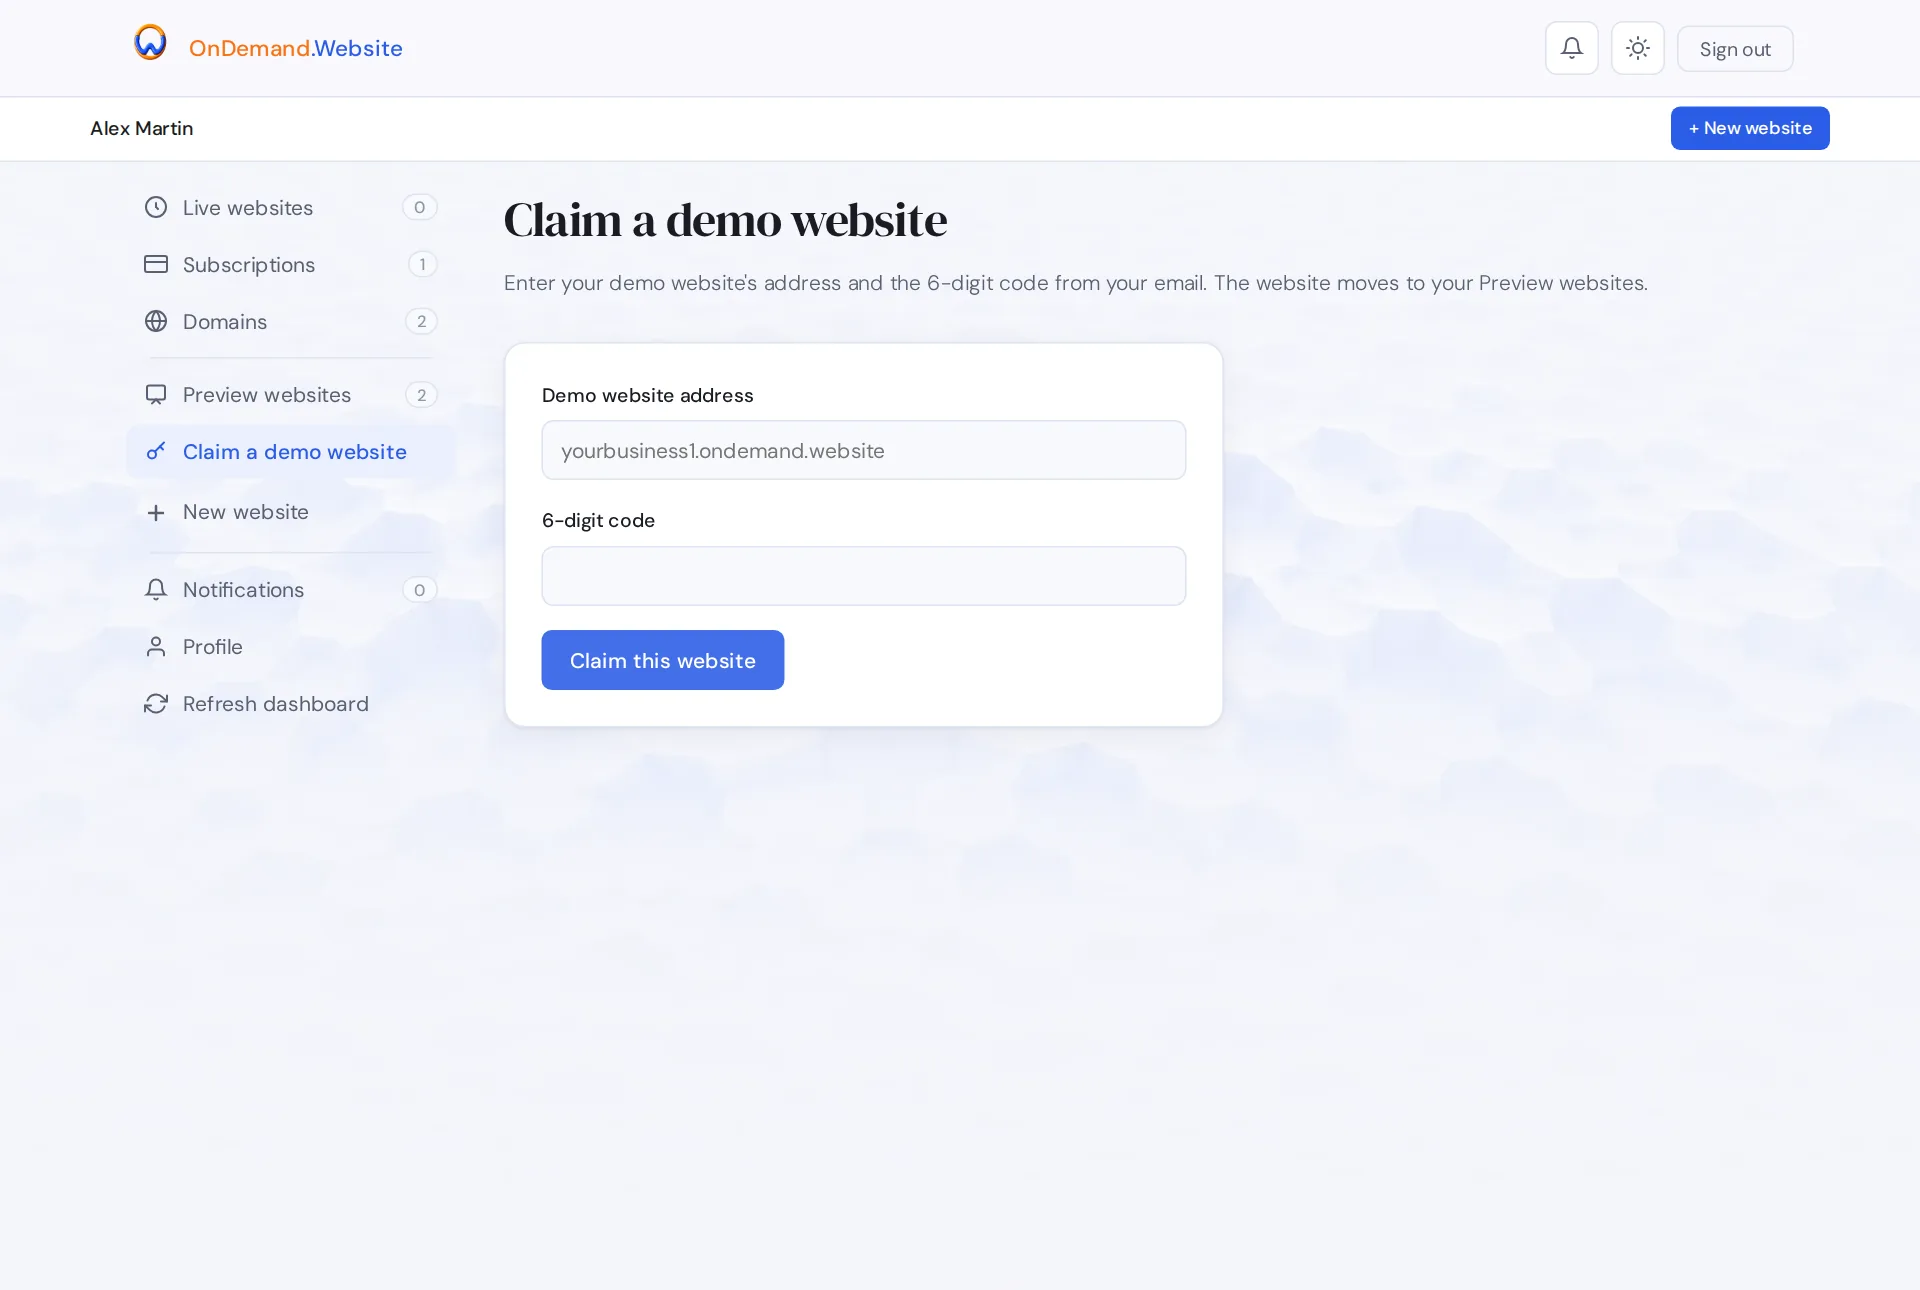
The website moves to your Preview websites at the same address, ready to change and take live. A code is valid for 90 days. After 5 wrong codes you can try once a minute, up to 25 tries a day.
Sign in, reset your password, verify your email
- Go to Sign in and enter your email and password.
- Forgot it? Press Forgot password?. We email you a code; enter it with a new password (at least 8 characters) and press Reset password and sign in.
- If we ask you to verify your email, enter the code we sent and press Verify and sign in. No code? Press Resend code.
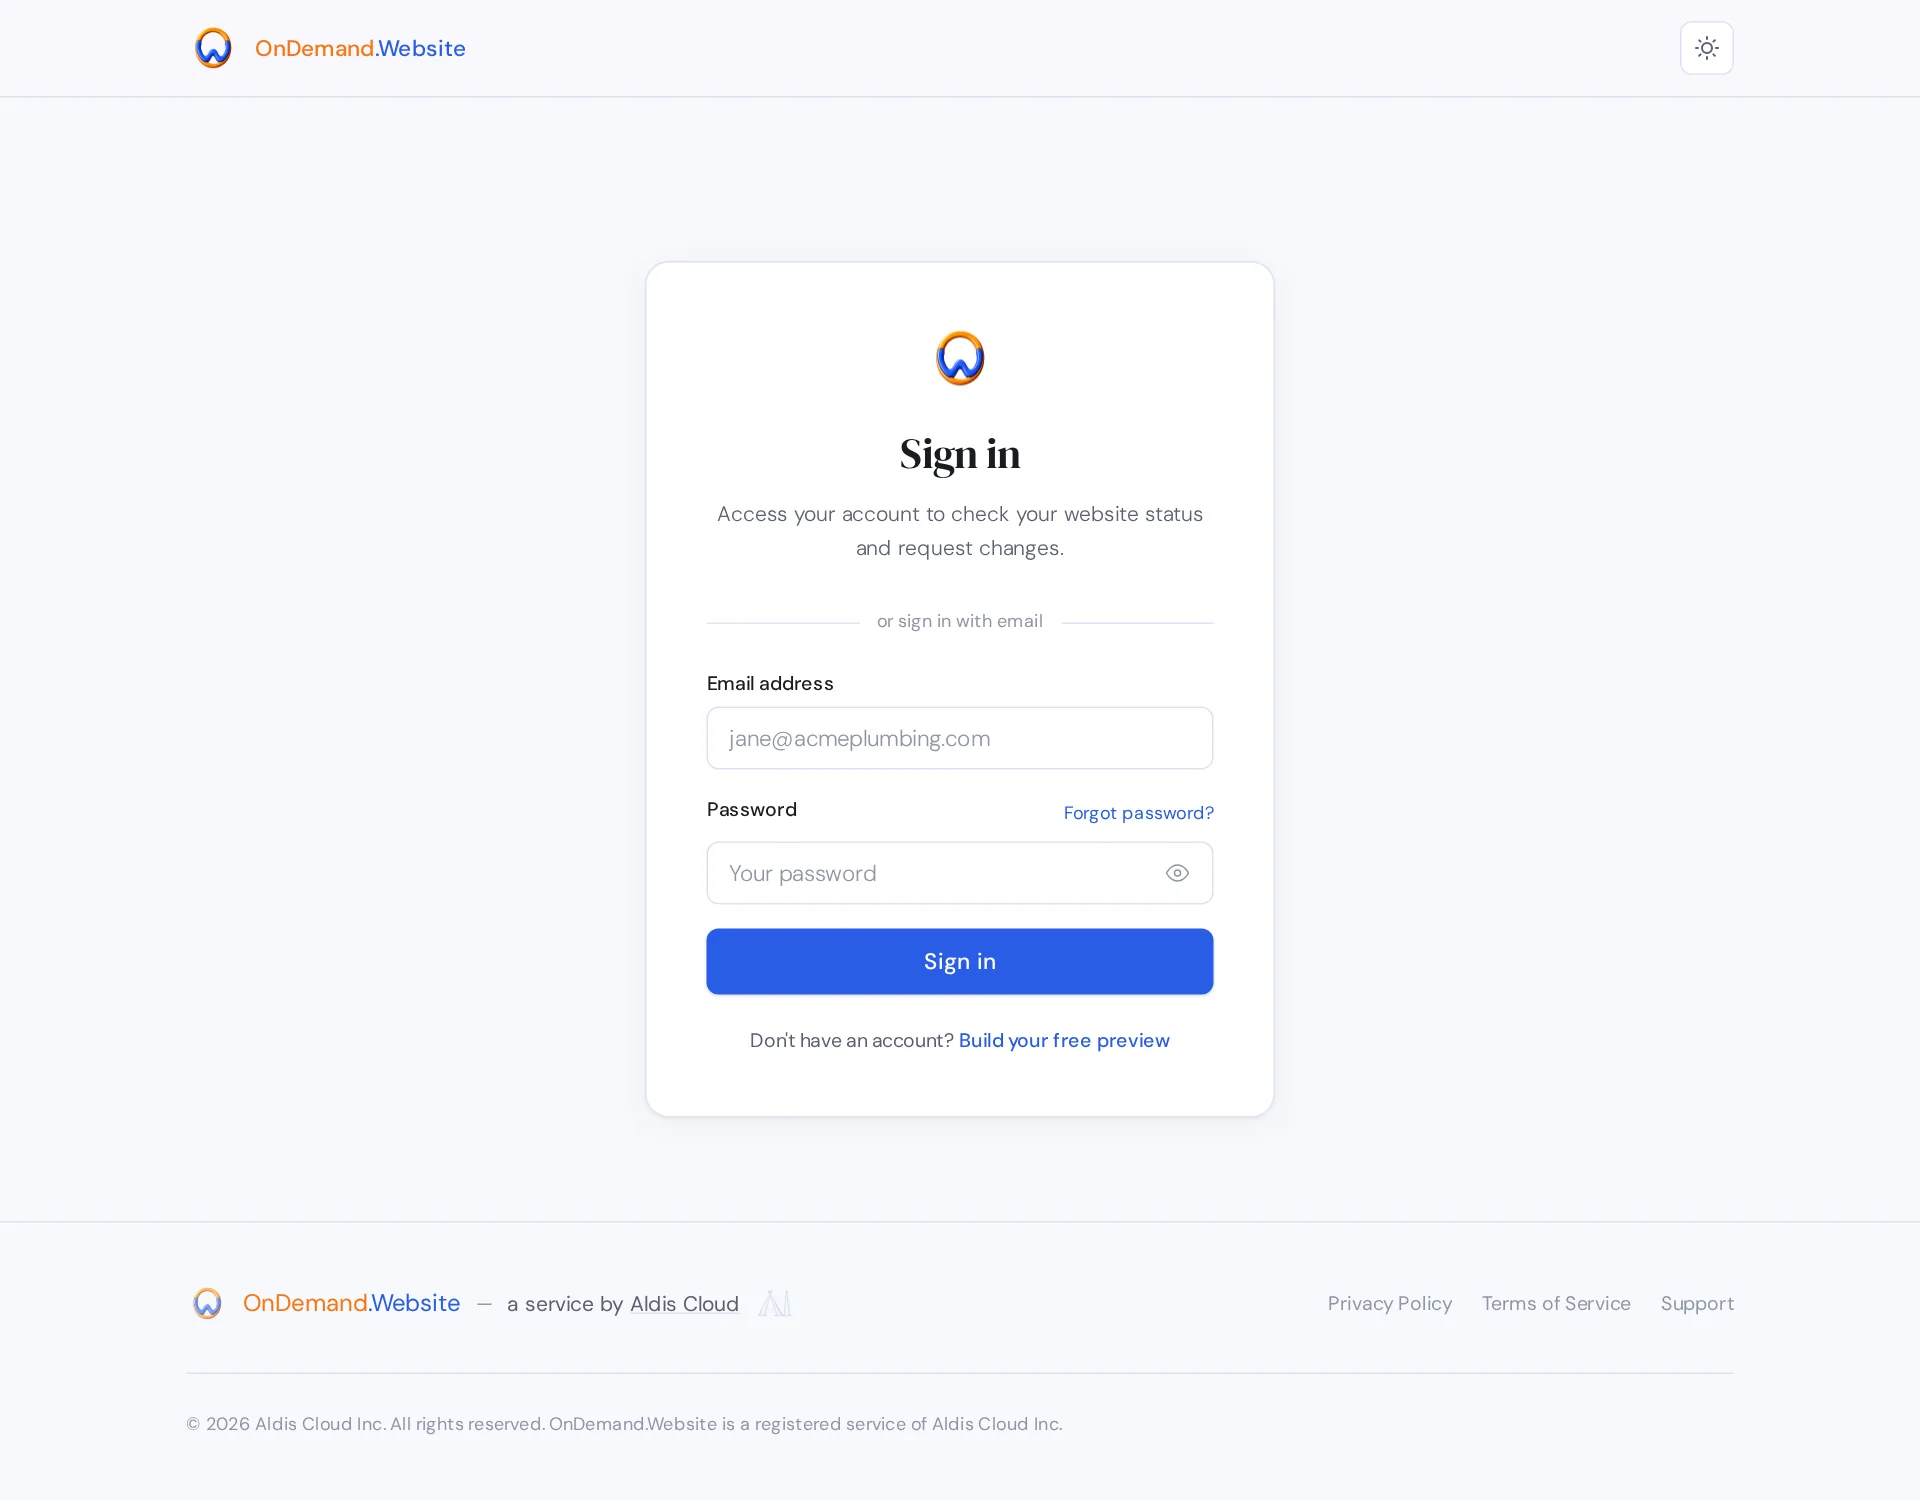
New here? Choose Build your free preview to start with the form.
Find your way around the dashboard
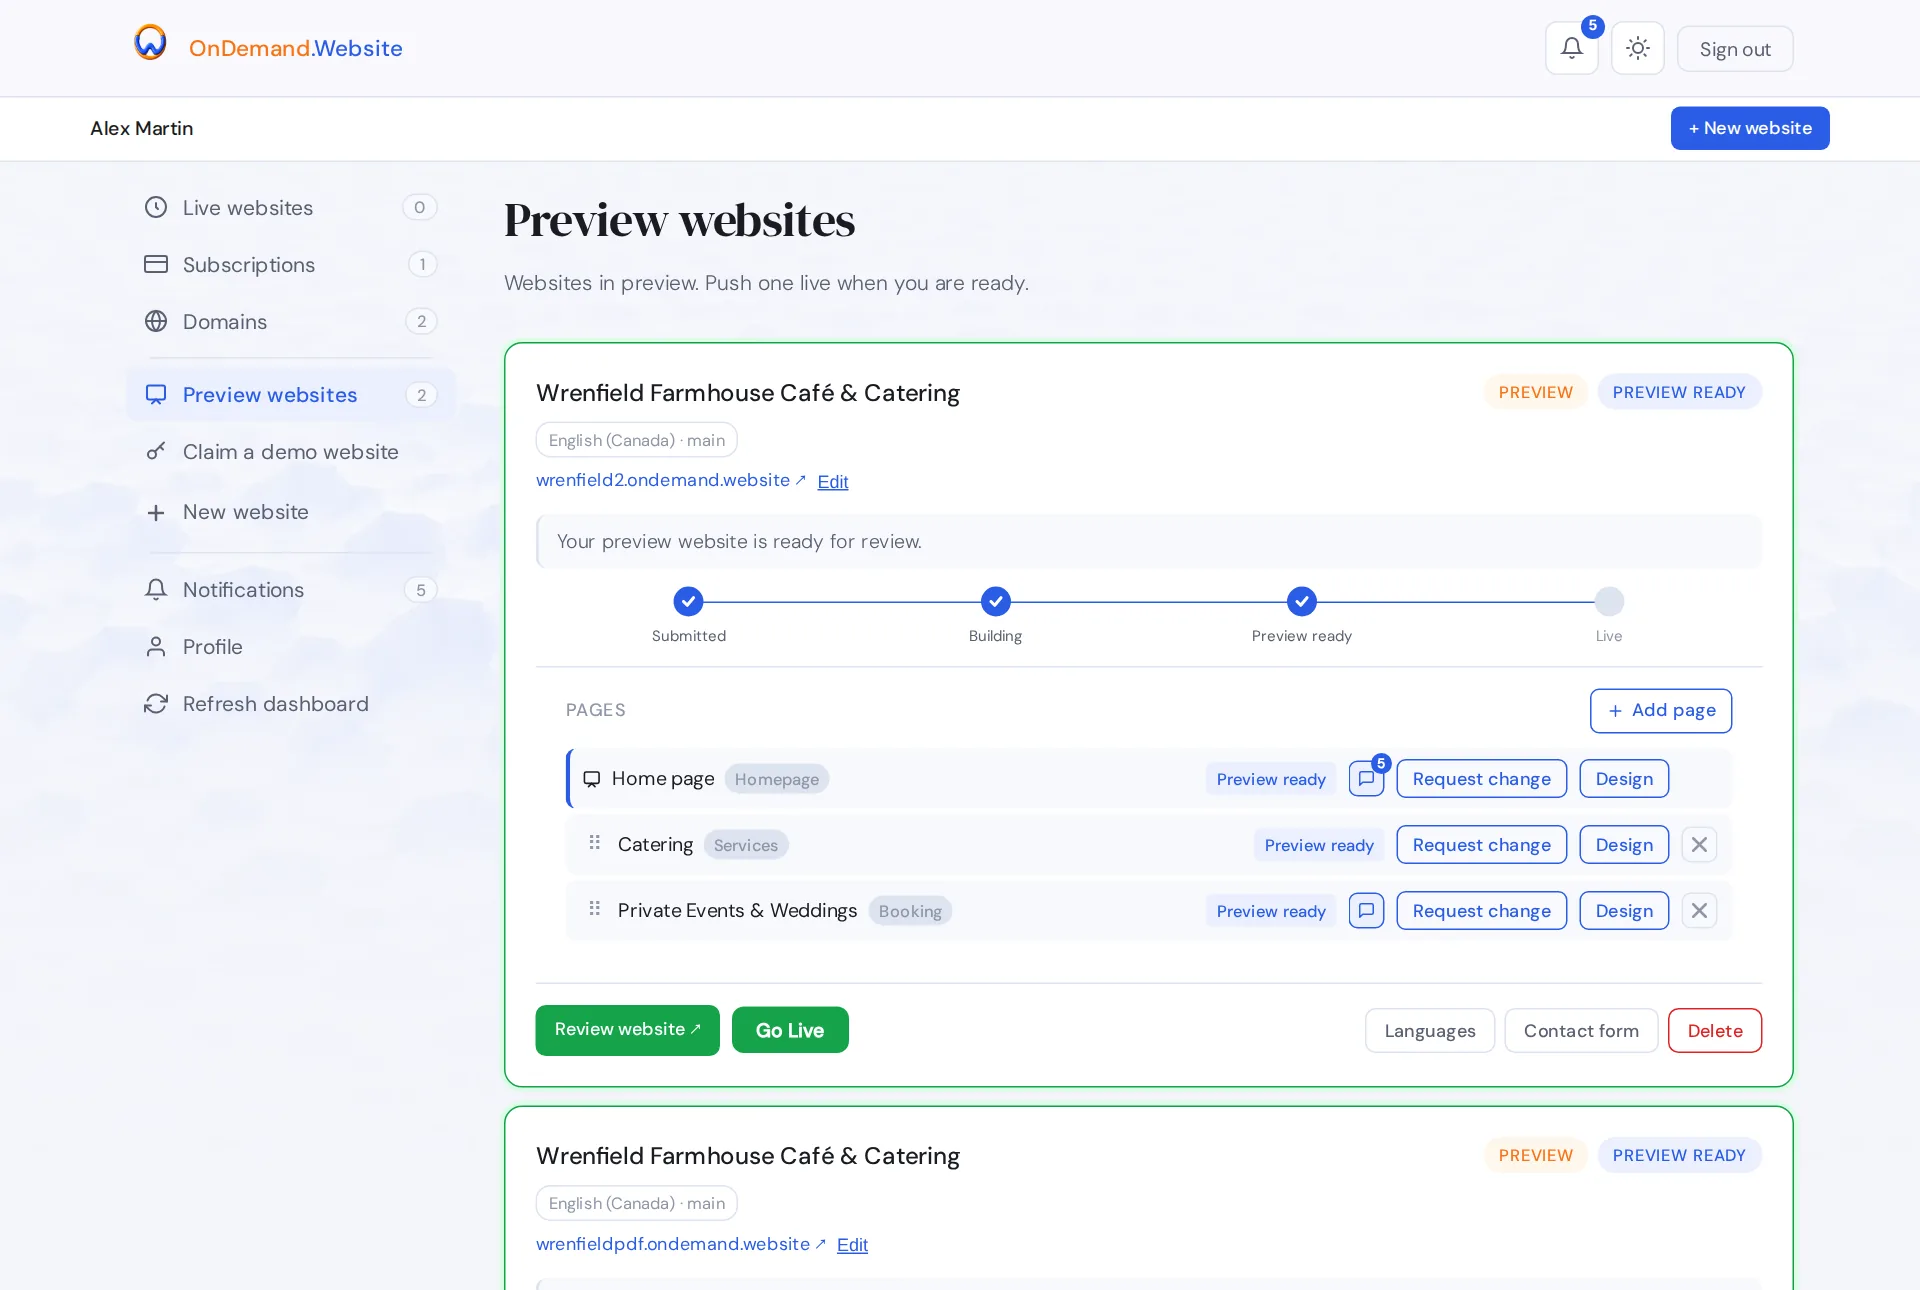
| Sidebar | What it holds |
|---|---|
| Live websites | Websites on a plan and published. Clone or move them back to preview. |
| Subscriptions | Your plans; add a plan; manage billing. |
| Domains | Buy, transfer and connect domains; renewal settings. |
| Preview websites | Every website you are working on: status, pages, changes and Go Live. |
| Claim a demo website | Claim a demo we built for you. |
| New website | Start another website with the form. |
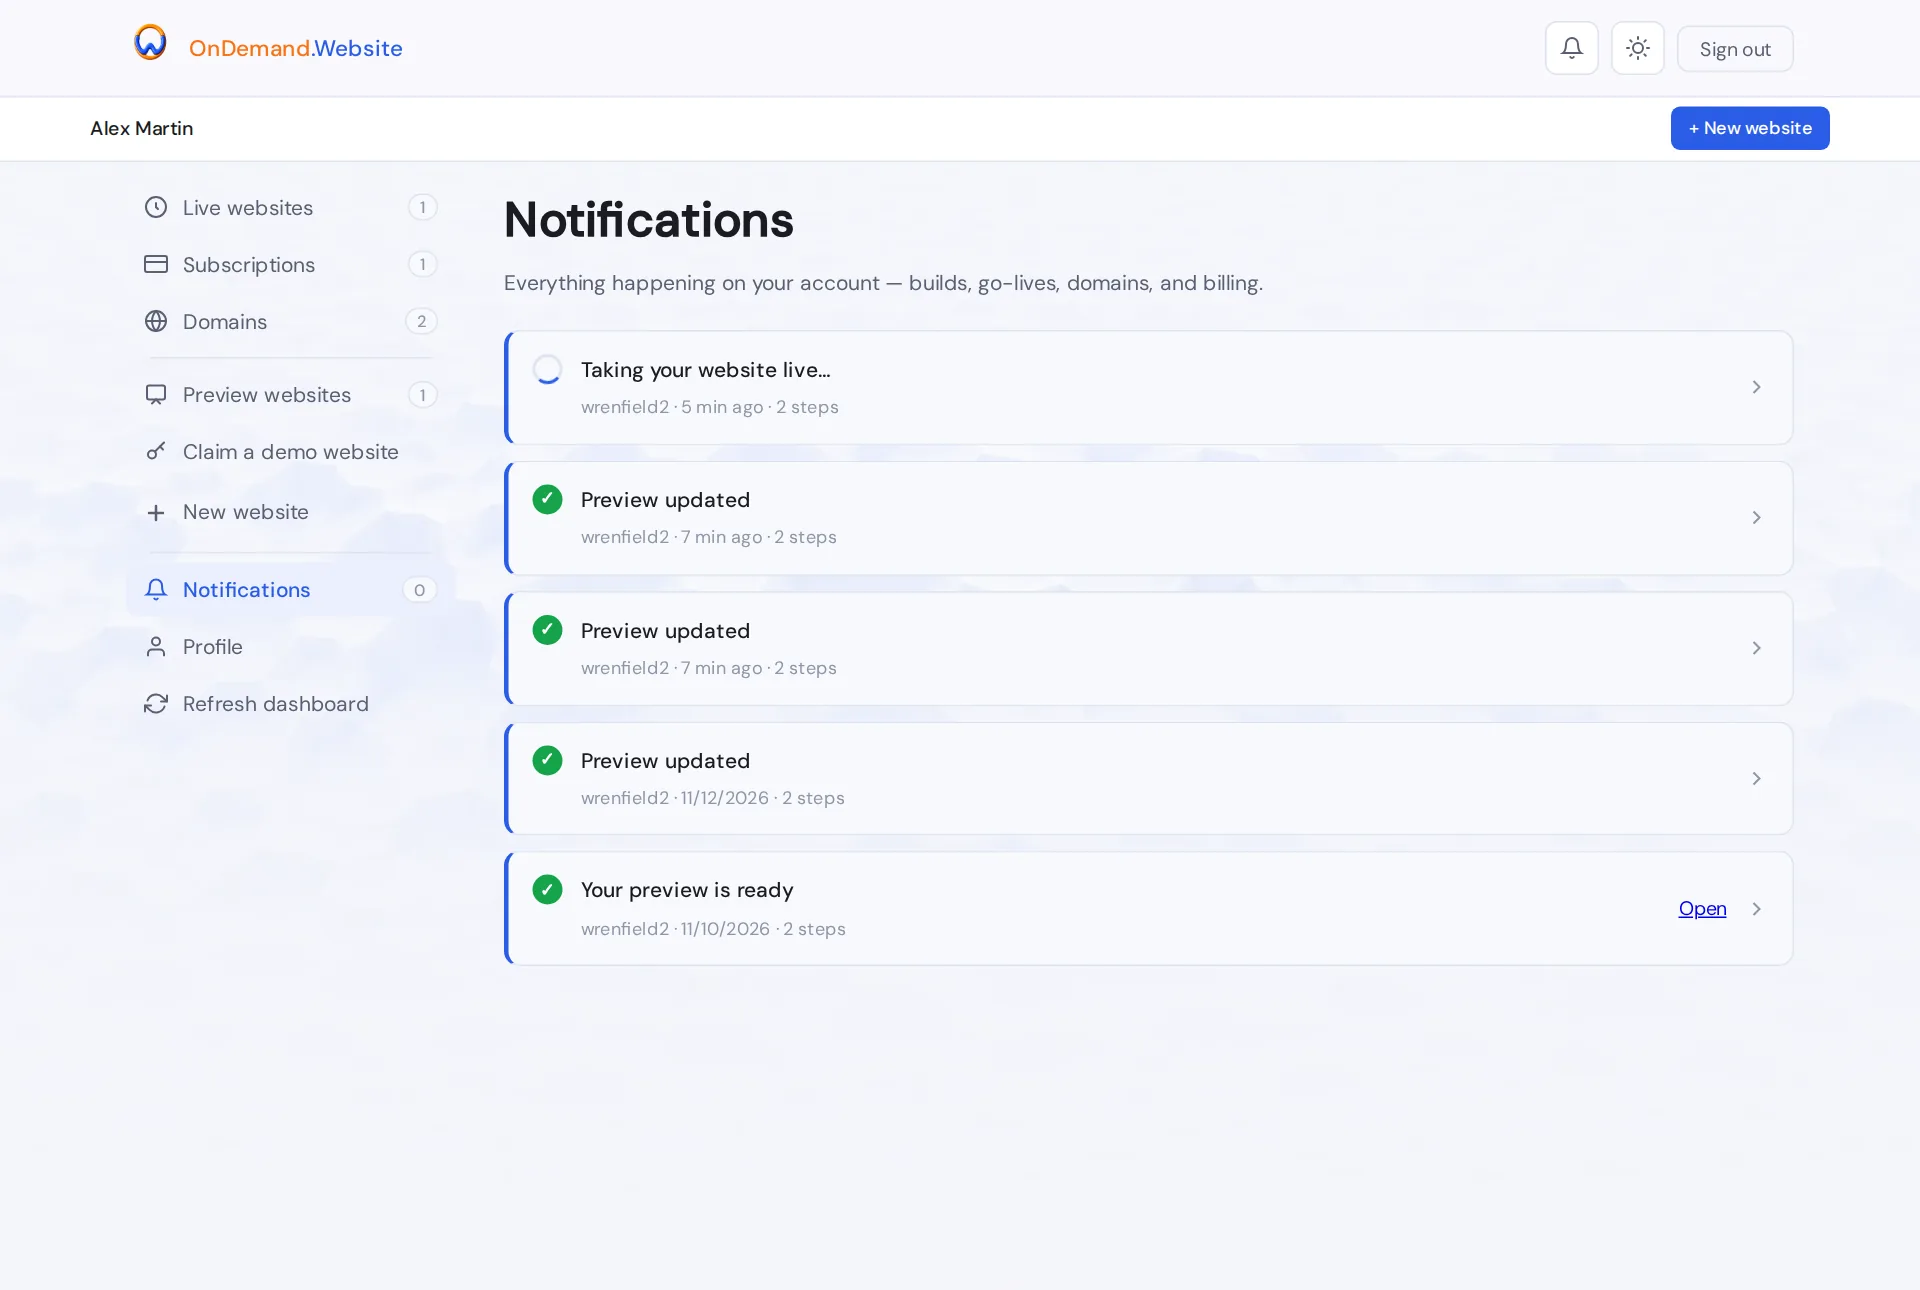
| Notifications | Everything happening on your account: builds, go-lives, domains and billing. The bell at the top shows new ones. |
| Profile | Your contact details and email preferences. |
| Refresh dashboard | Loads the latest status. The dashboard also checks for news every minute. |
The sun/moon button switches light and dark mode. Sign out is at the top right.
Work on a preview
Read your website's status
Each preview card shows a badge, a short note and a tracker: Submitted → Building → Preview ready → Live.
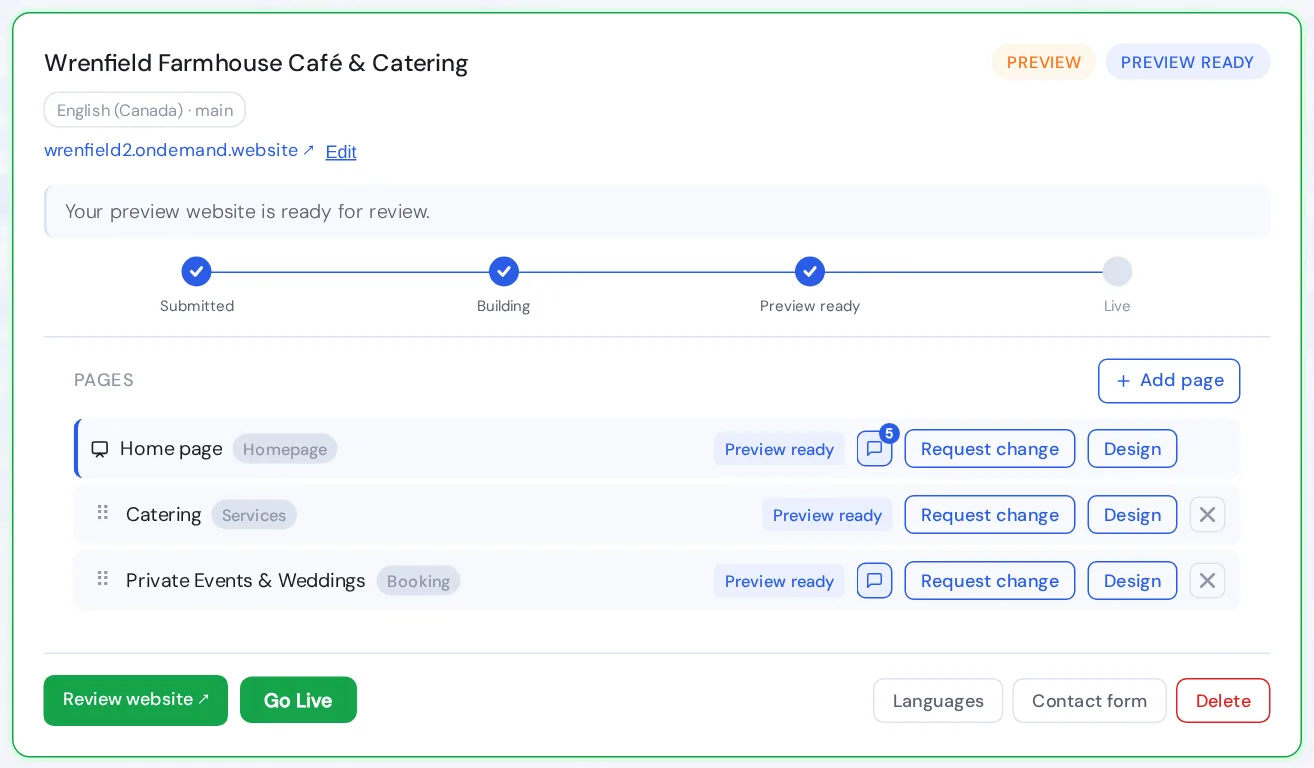
| Status | Meaning |
|---|---|
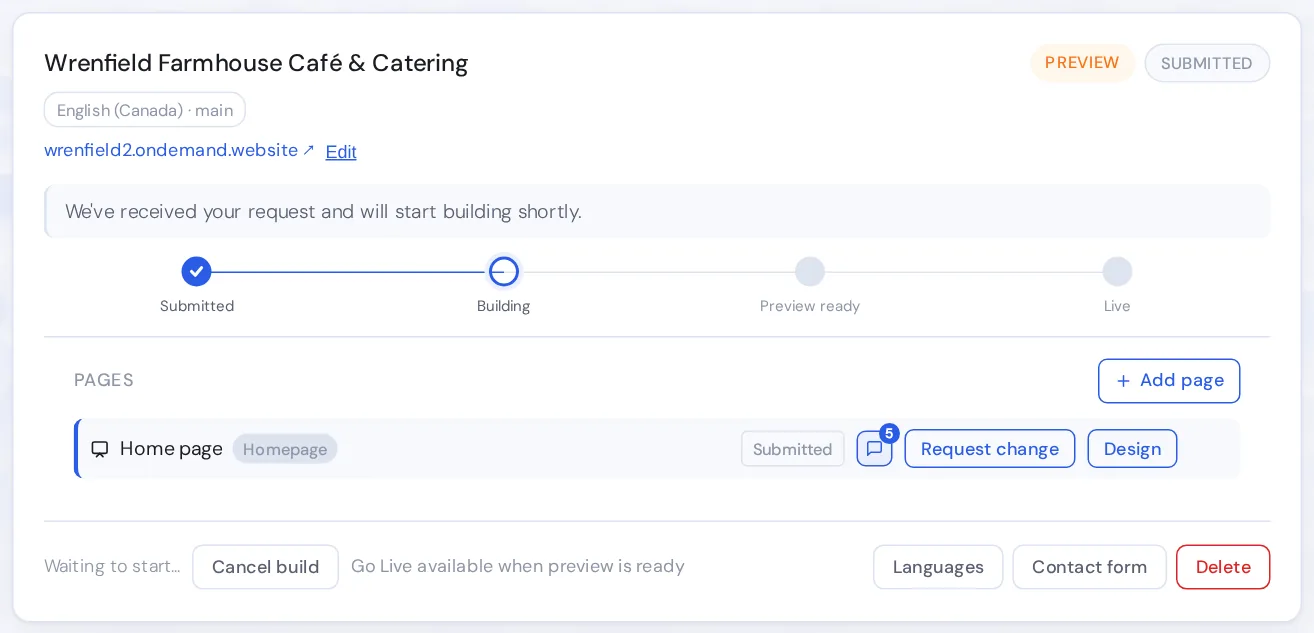
| Submitted | We have your request; the build starts shortly. You can still Cancel build. |
| Building | Your website is being built. You'll hear from us within a few hours. |
| Preview ready | Ready to review, change, or take live. |
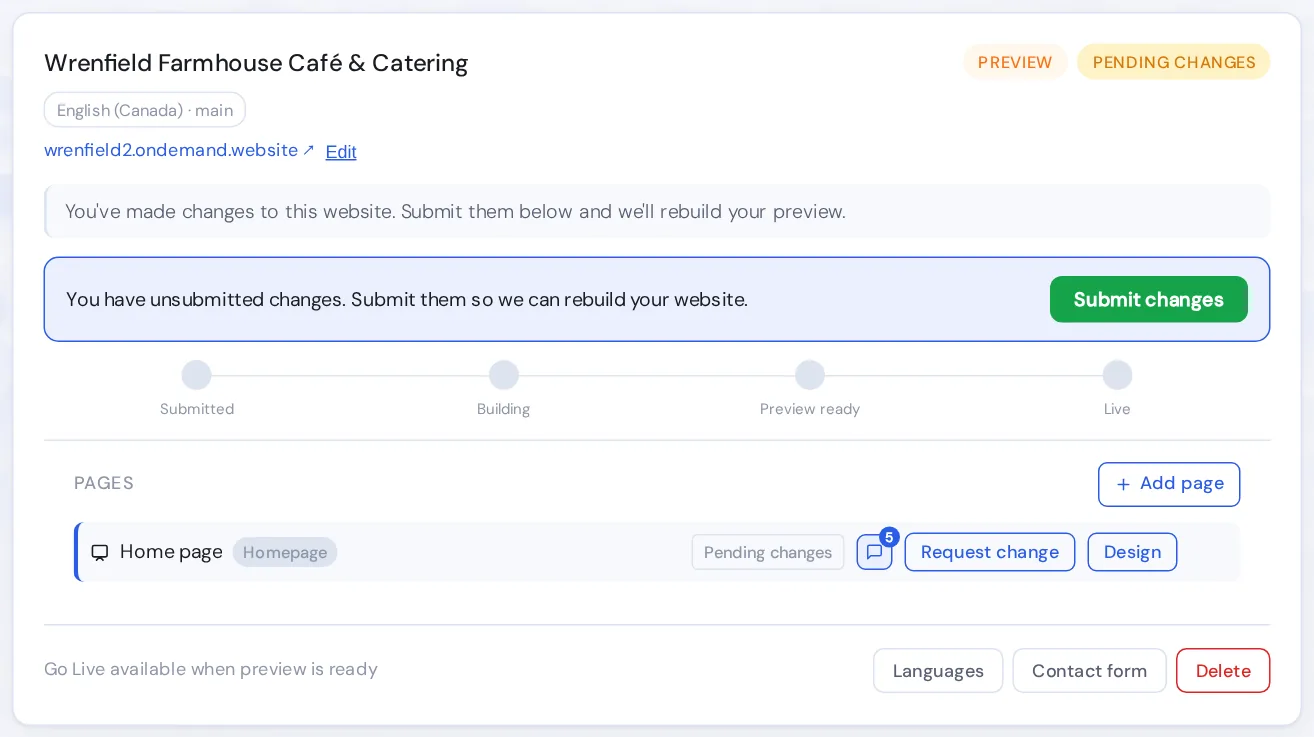
| Pending changes | You've made changes that are not submitted yet. Press Submit changes. |
| Build cancelled | You cancelled the build. Submit it when you're ready. |
| Needs your attention | We need something from you. Open the build feedback icon on the page rows. |
| Going live… | Your website is being published. |
| Live | Published on a plan. |
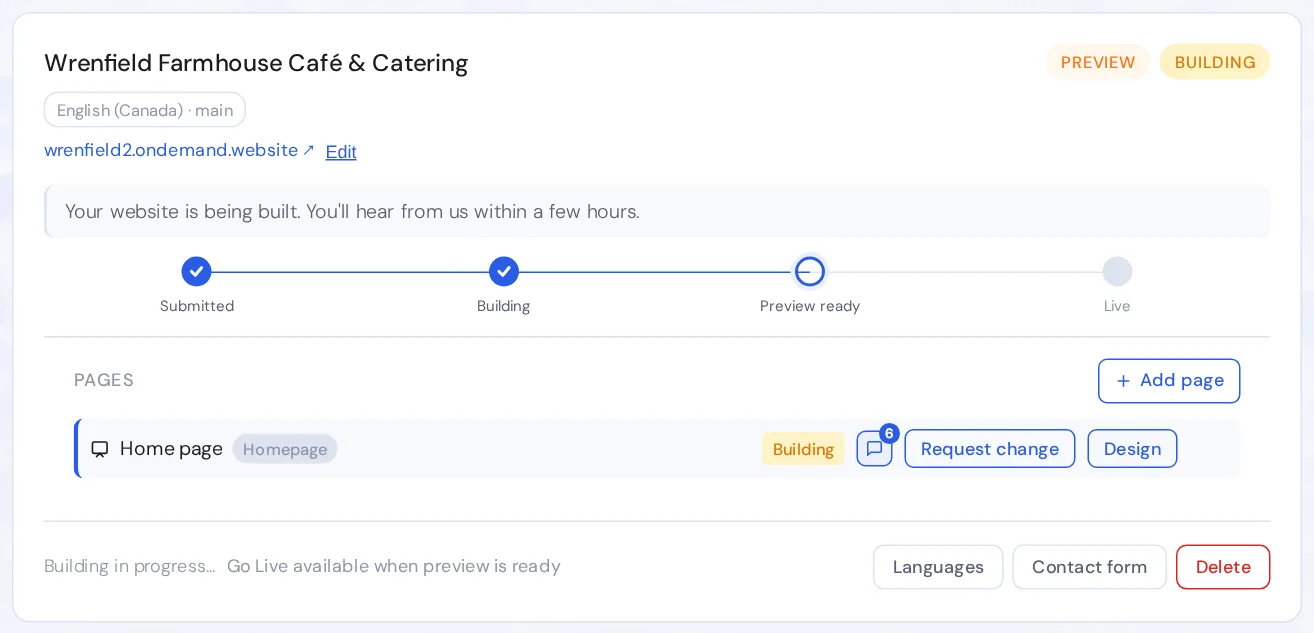
Request a change
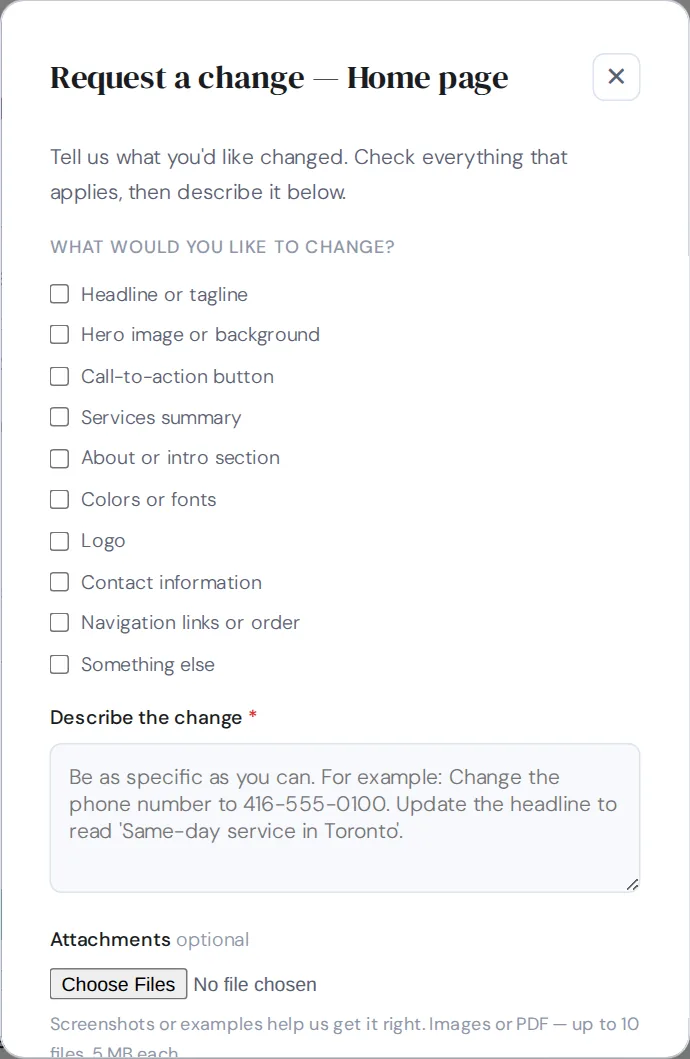
Change words, photos, colours, layout or anything else on a page of your preview.
- On the page's row, press Request change (the homepage has its own row).
- Tick what you want changed, then describe it. Be specific: "Change the phone number to 416-555-0100."
- For a website in several languages, choose Which language version?. A fix to a translated page is kept when the page is translated again.
- Optionally attach screenshots, examples or PDFs: images or PDF, up to 10 files, 5 MB each.
- Press Submit request. The change is saved; nothing is built yet.
- Add more changes if you like, then press Submit changes on the card to send them all to us.
Submit your changes
Change requests, new or deleted pages, page order, design, languages and the contact form switch all wait on your preview until you submit them, so you can collect several and send them once.
- Make your changes. The card shows Pending changes and the bar You have unsubmitted changes.
- Press Submit changes. The status becomes Submitted, then Building, then Preview ready with your changes.
Cancel a build before it starts
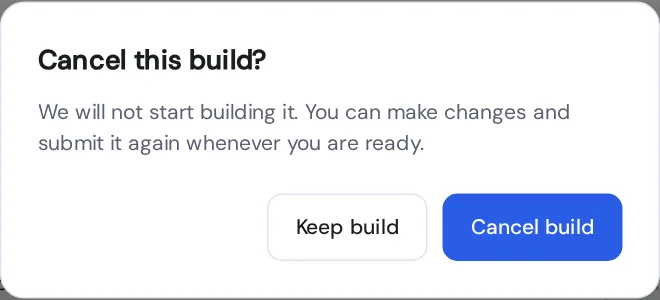
Submitted too early? You can cancel while the card says Waiting to start…. Once building starts, it can no longer be cancelled.
- Press Cancel build on the card.
- Confirm with Cancel build (or Keep build to change your mind).
- Make your changes, then press Submit for build.
Undo the latest changes
Don't like the latest version? Go back one step to the previous one.
- On a preview that is Preview ready, press Undo latest changes. The button appears only when there is an earlier version.
- Confirm with Undo changes. Restoring takes up to a minute.
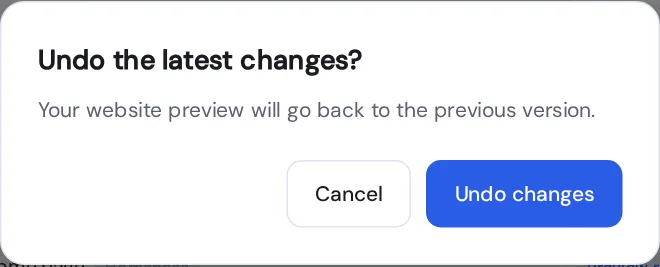
Undo goes back one version, not further. Changing the preview's address clears the undo history.
Add a page
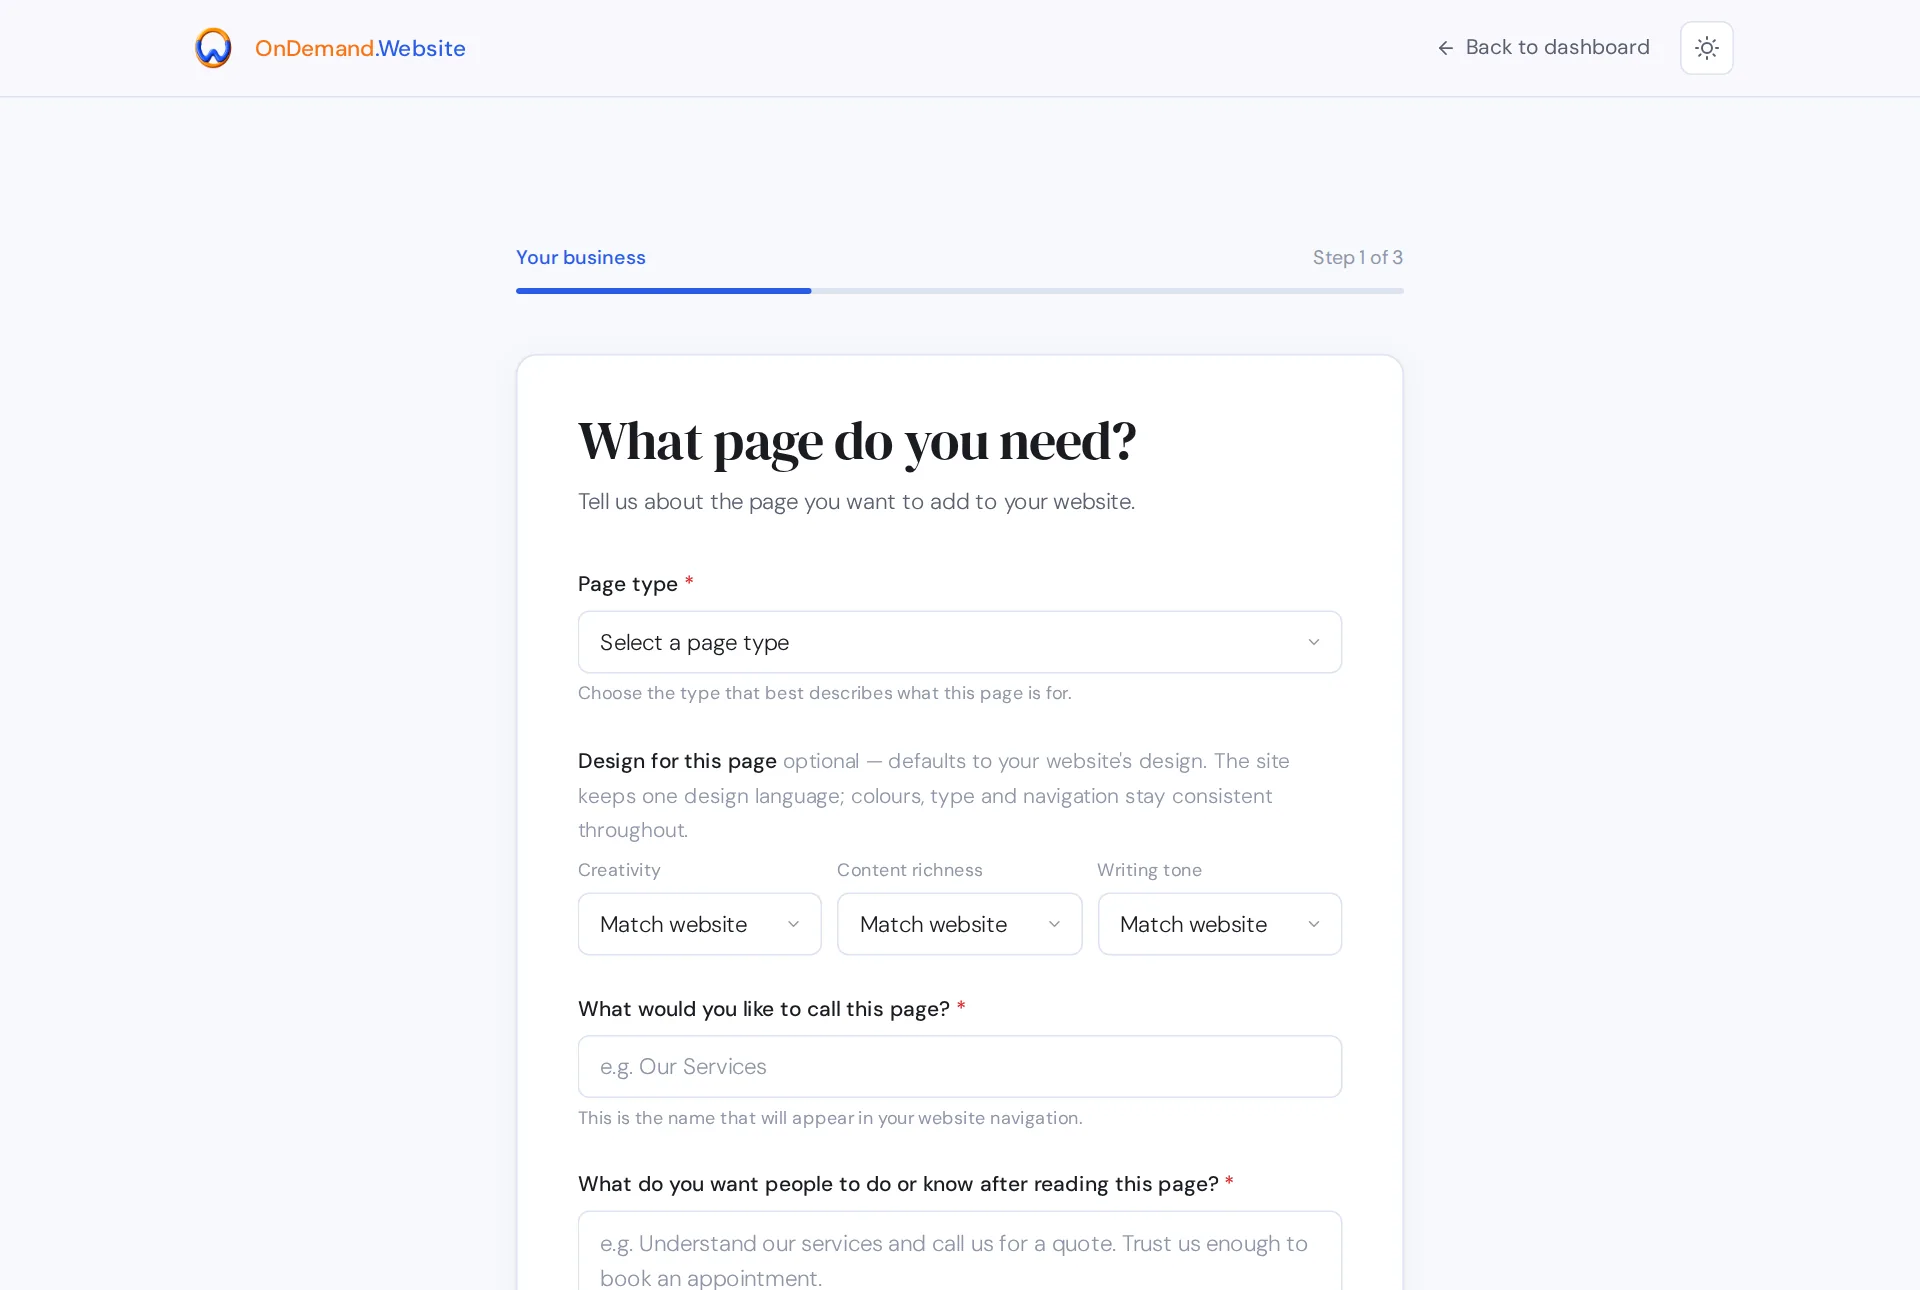
- On the preview card, press Add page.
- What page do you need? Choose the page type and name, what visitors should do or know, and optionally its design.
- What goes on this page? Answer the questions for that type and add photos (up to 20, 5 MB each, 20 MB in total).
- Review and submit. Back on the dashboard, press Submit changes to build it.
Reorder pages
- Drag a page by its ⠿ handle to a new place (the homepage always stays first).
- Press Apply new order, or Discard to undo the move.
- Press Submit changes to rebuild the website in the new order.
Delete a page
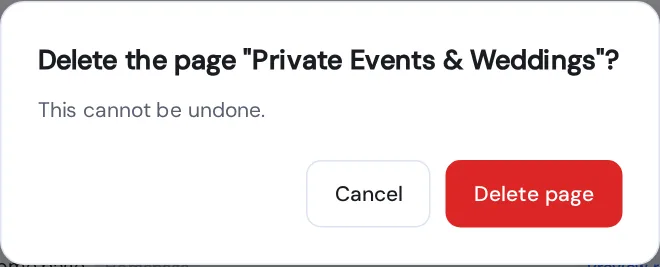
- Press the ✕ at the end of the page's row.
- Confirm with Delete page. This cannot be undone.
- Press Submit changes to rebuild the website without it.
Change the design
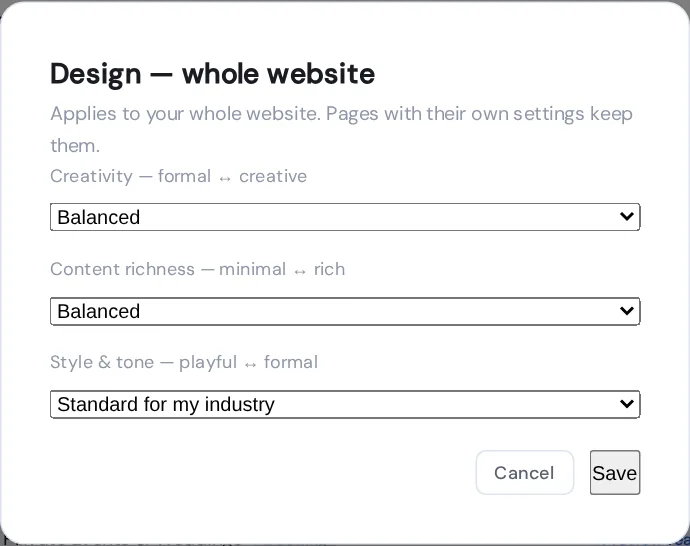
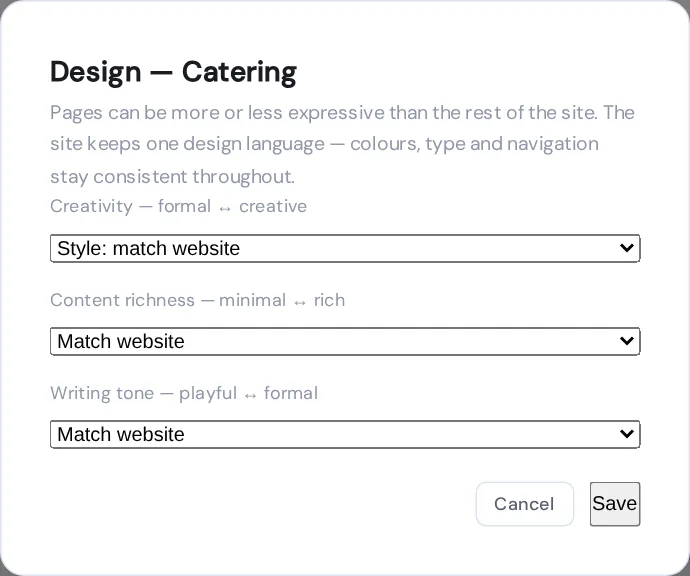
Make the whole website, or one page, more formal or more creative, leaner or richer, more playful or more formal in tone.
- For the whole website, press Design on the Home page row. For one page, press Design on that page's row.
- Whole website: choose Creativity, Content richness and Style & tone. One page: A bit more expressive or A bit calmer, content richness and writing tone, or Match website.
- Press Save, then Submit changes to rebuild.
Add or change languages
Your website can be built in English (Canada), English (US), French (Canada) and Spanish (US). You write in your main language; we translate the rest automatically, and you review the result.
- Press Languages on the preview card.
- Choose the Main language and tick any Additional languages.
- Press Save, then Submit changes.
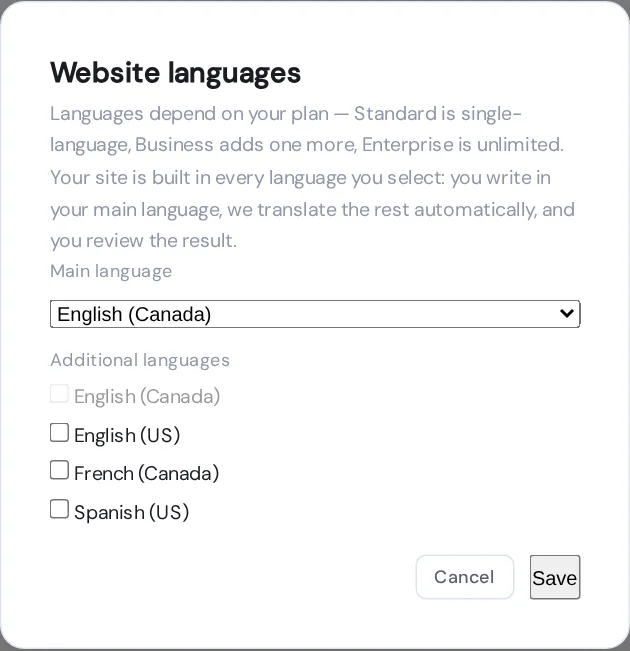
Plans: Standard is one language, Business adds one more, Enterprise is unlimited. The plan is checked when you go live.
Set up the contact form
Let visitors send you a message (name, email and message) from your website's Contact page. We email it to you; pressing Reply answers the visitor. We don't keep a copy.
- Press Contact form on the preview card.
- Under Send messages to, enter the address (or press Use my sign-in email) and press Save address. Your own sign-in email is confirmed at once; any other address gets a confirmation link, valid for 7 days. Open it and press Confirm.
- Tick Show the contact form on my website and press Save.
- Press Submit changes to add the form to your website.
- Once the website is live, press Send a test message to check delivery.
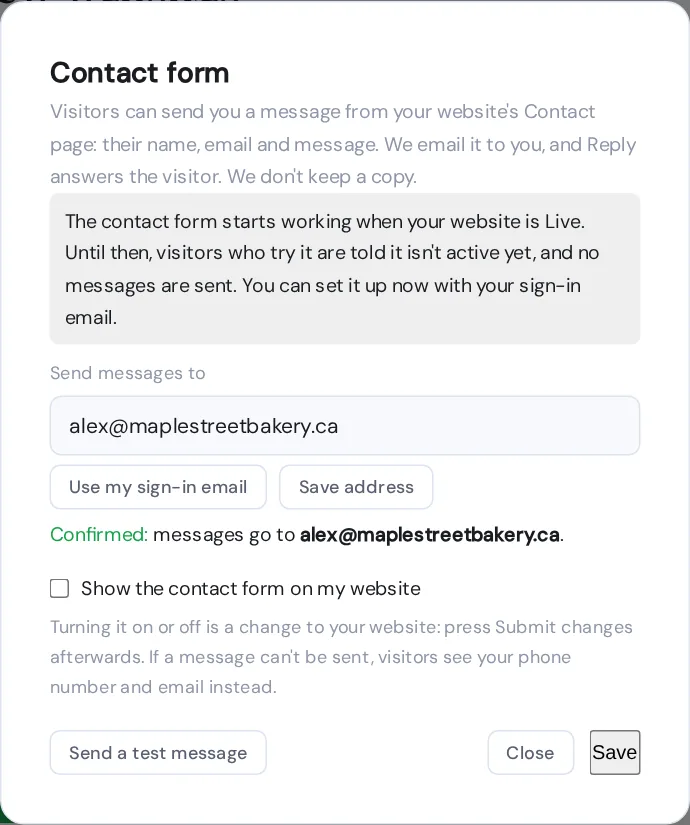
If a message can't be sent, visitors see your phone number and email instead. Each visitor can send up to 10 messages an hour and 25 a day, and a website receives up to 200 a day. Messages that look like spam arrive marked [Possible spam].
Read build feedback
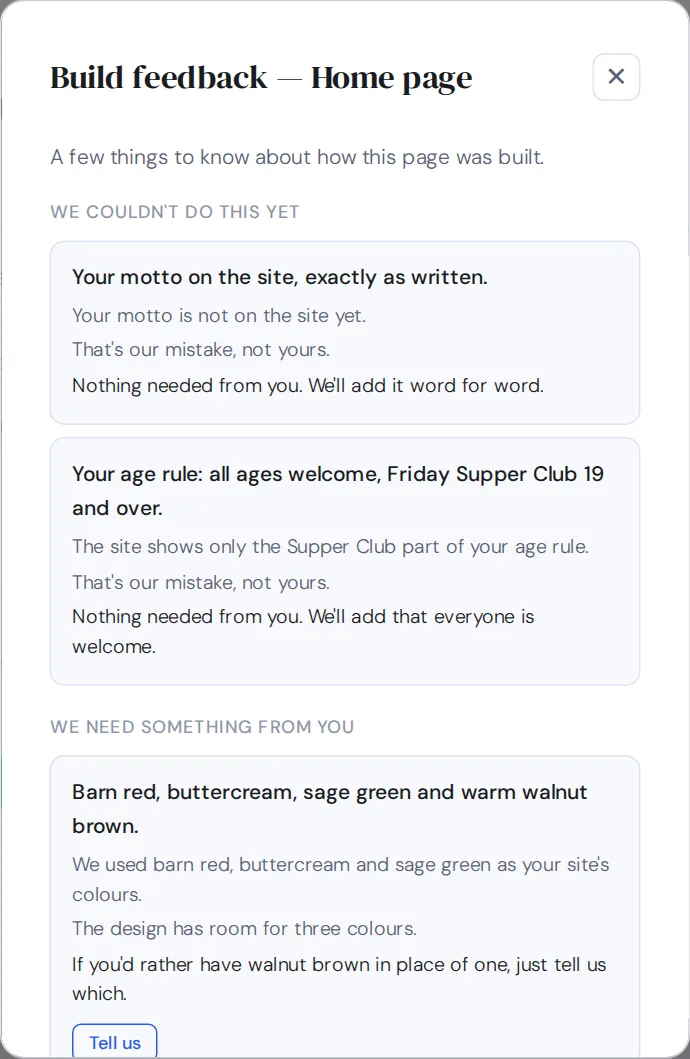
When the build did something differently from what you asked, the page's row shows a speech-bubble icon with a count.
- Press the icon on the page's row.
- Each note says what you asked, what we did and why, under one of three headings: We couldn't do this yet, We need something from you or This isn't something we build.
- For a note under We need something from you, press Tell us; it opens a change request for that page.
Change your preview's web address
- Press Edit beside the address on the preview card.
- Type the new name. Letters and numbers only; it becomes
yourname.ondemand.website. - Press Save address.
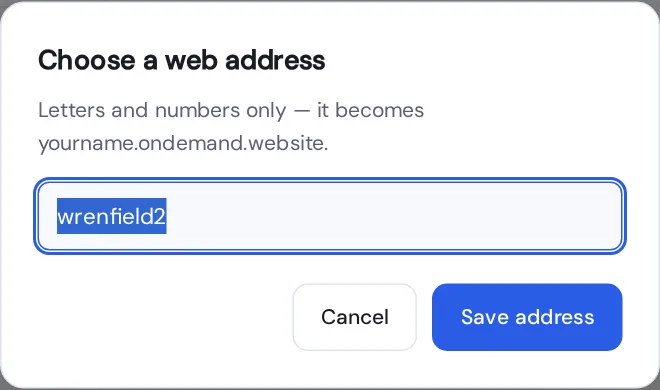
Changing the address clears the undo history. It doesn't change the address of a website that is already live.
Delete a website
- Press Delete on the preview card.
- Confirm with Delete website.
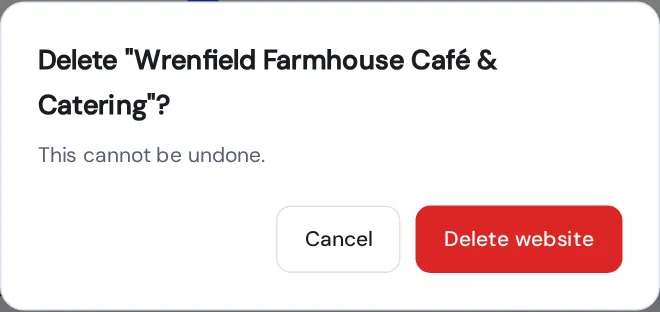
This cannot be undone: the preview, its pages and the files you uploaded are removed. If this preview's website is live at another address or on a domain, move the live website to Preview first.
Go live
Choose a plan
Previews are free. To publish a website you need a plan; each plan hosts one live website.
- Open Subscriptions.
- Choose Monthly or Annual with the switch (annual saves up to 35%).
- Press Add this plan on Standard, Business or Enterprise and pay on the secure checkout page.
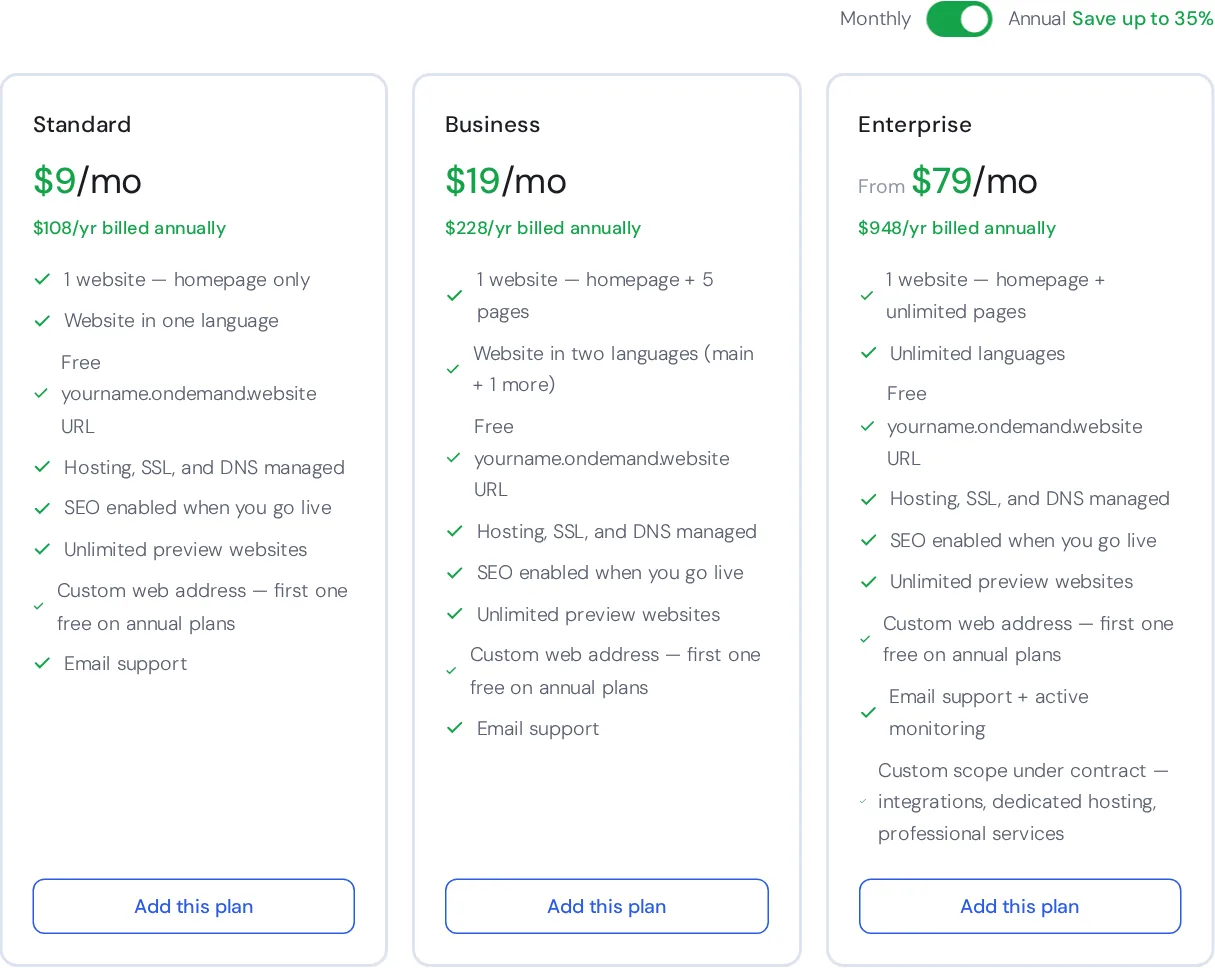
| Standard | Business | Enterprise | |
|---|---|---|---|
| Monthly | $14/mo | $29/mo | from $119/mo |
| Annual | $9/mo ($108/yr) | $19/mo ($228/yr) | from $79/mo ($948/yr) |
| Pages | Homepage only | Homepage + 5 | Unlimited |
| Languages | 1 | 2 | Unlimited |
| Support | Email + active monitoring |
Every plan includes hosting, the security certificate (SSL), DNS, a free yourname.ondemand.website address and SEO when you go live. Annual plans include one domain: its first registration is free for any address up to $25/yr.
Go Live on a free ondemand.website address
Publish your website at yourname.ondemand.website, included with every plan.
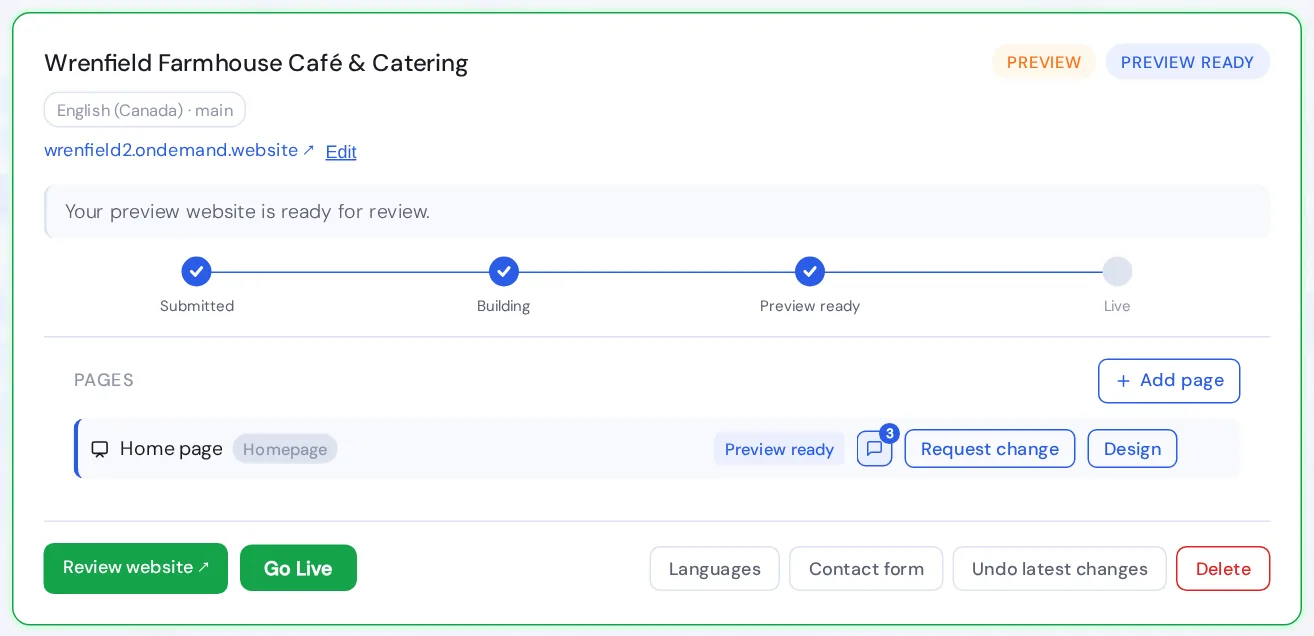
- On a preview that is Preview ready, press Go Live.
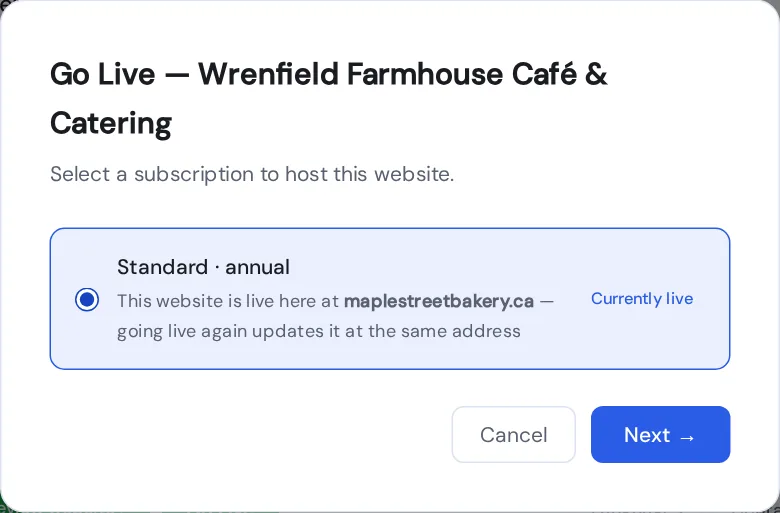
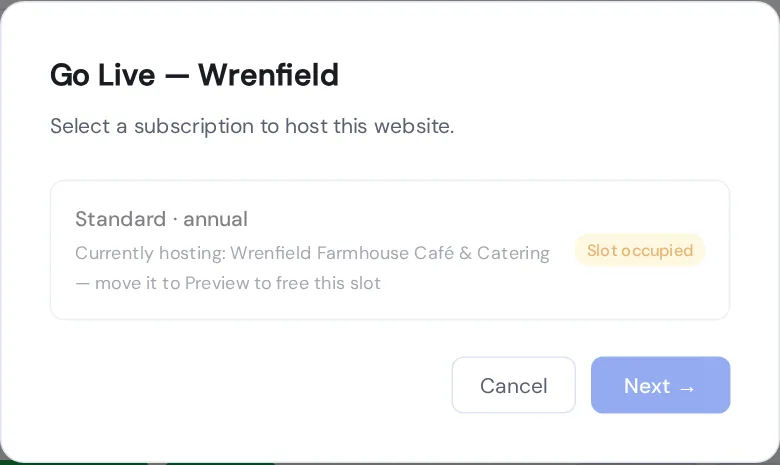
- Select a subscription marked Slot available and press Next →. If the website has more pages or languages than that plan allows, you're told here.
- Under Choose a web address, the box shows the address you asked for in the form; edit it if you like (letters and numbers), then press Continue →.
- The website is published. Press Track it on Live websites to follow it from Deploying to Live.
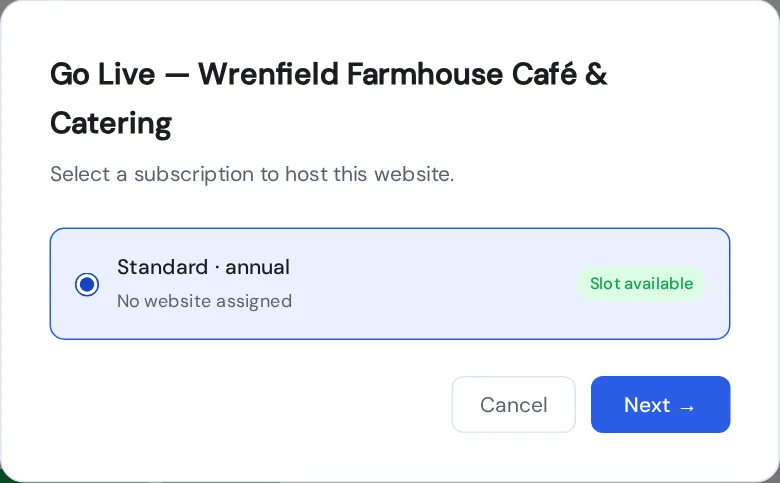
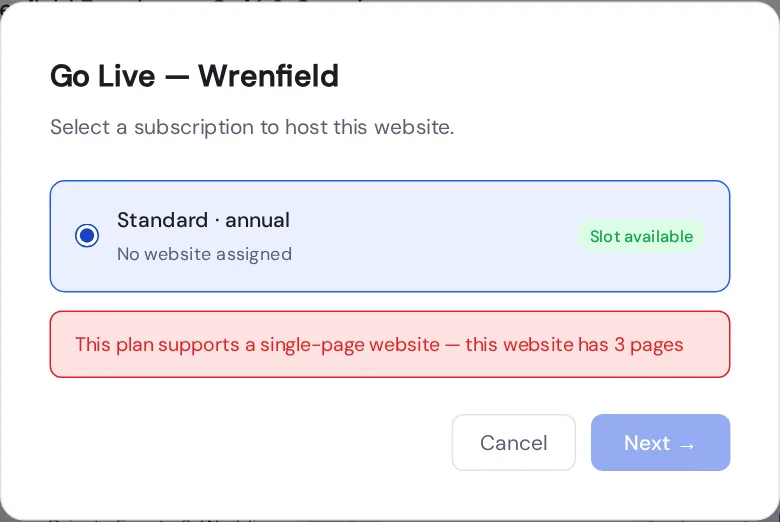
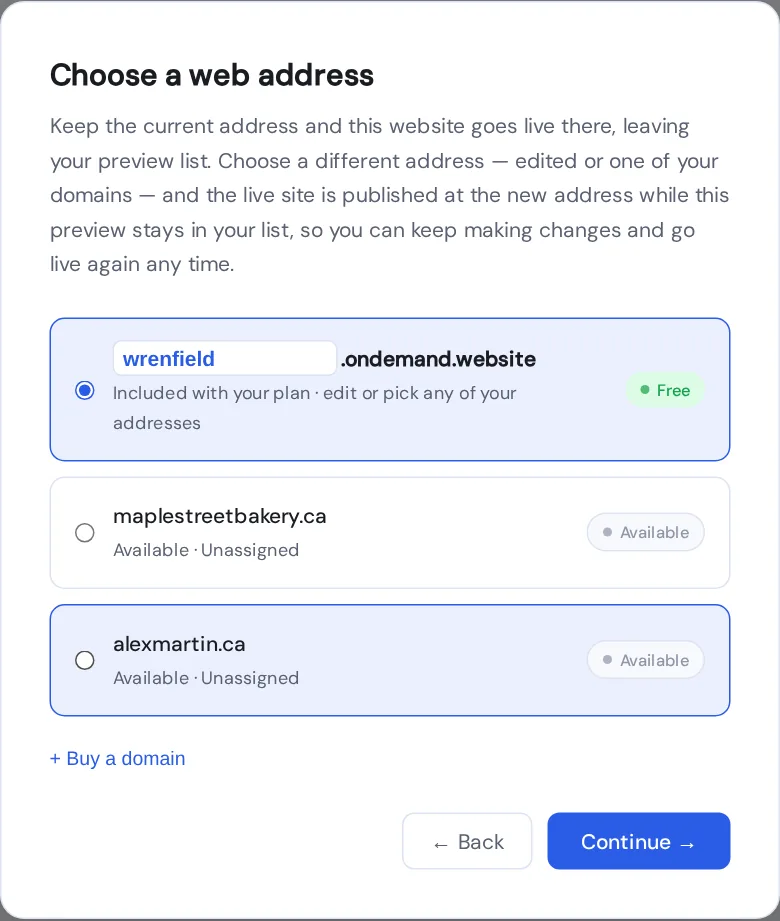
Publishing runs every few minutes; the status on Live websites changes as each step completes.
Go Live with a domain you bought or transferred to us
Publish your website at your own domain, such as yourbusiness.ca. We set up its DNS, security certificate and routing for you.
- Have the domain in Domains, marked Registered and not used by another website (buy or transfer one). The Go Live window also has + Buy a domain.
- Press Go Live on the preview, select a subscription, press Next →.
- Select the domain (marked Available) and press Continue →. Connecting it takes up to a minute.
- On Live websites the card shows Deploying (and Setting up domain while the domain is still being configured), then Live. Setup usually completes within the hour.
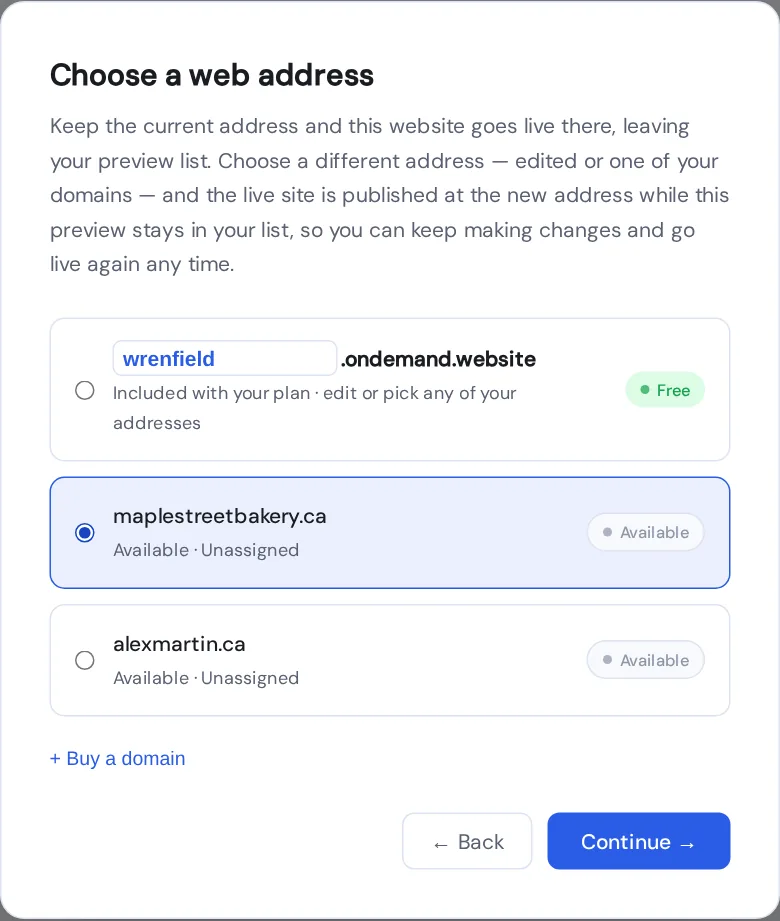
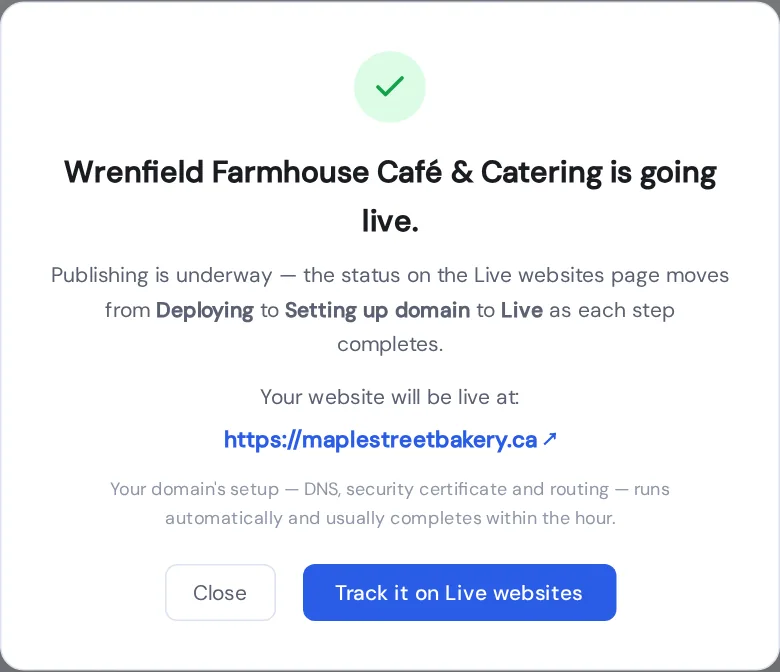


yourbusiness.ca, not www.yourbusiness.ca), and only on the domain: there is no ondemand.website live address beside it. Your preview stays in your preview list.Go Live with a domain you keep at your own provider
Keep the domain at your registrar and DNS provider and add two records there yourself. Free. Your email and other records stay untouched.
- Connect the domain and add the verification record. Wait until the domain shows Registered and Verified.
- Press Go Live on the preview, select a subscription, then select the domain and press Continue →.
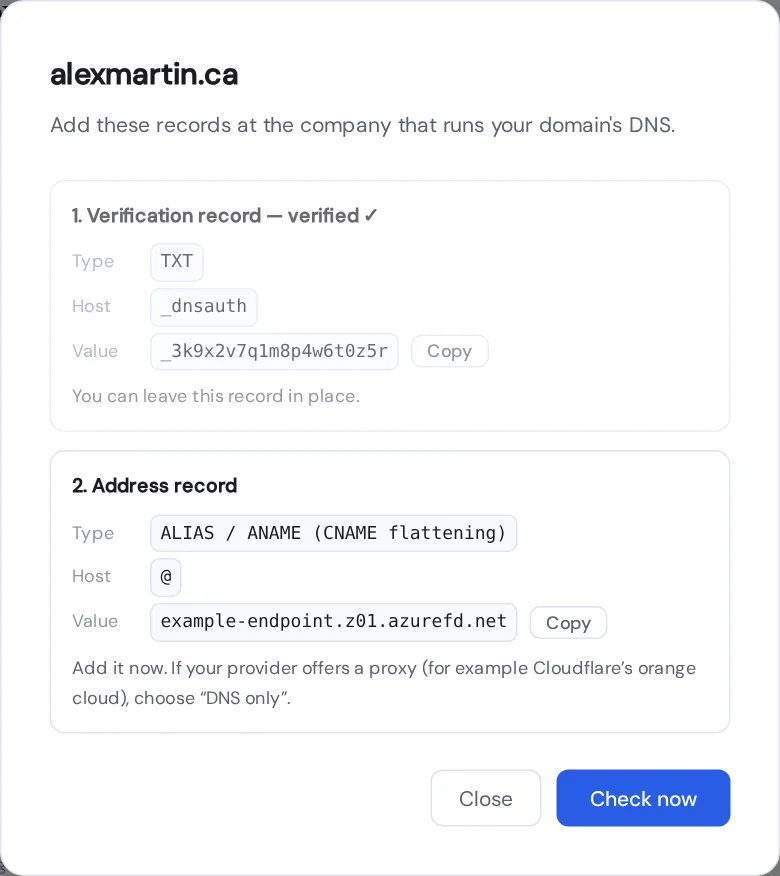
- Now add the address record at your DNS provider (Domains → Show records). Don't add it earlier: until you go live it would replace your current website with an error page.
- Press Check now. When the record works, the domain shows Live.
Update your live website
How you update depends on the address you went live at.
Live at a different address or on a domain (the preview is still in your list)
- Make changes on the preview and press Submit changes. The live website stays as it is meanwhile.
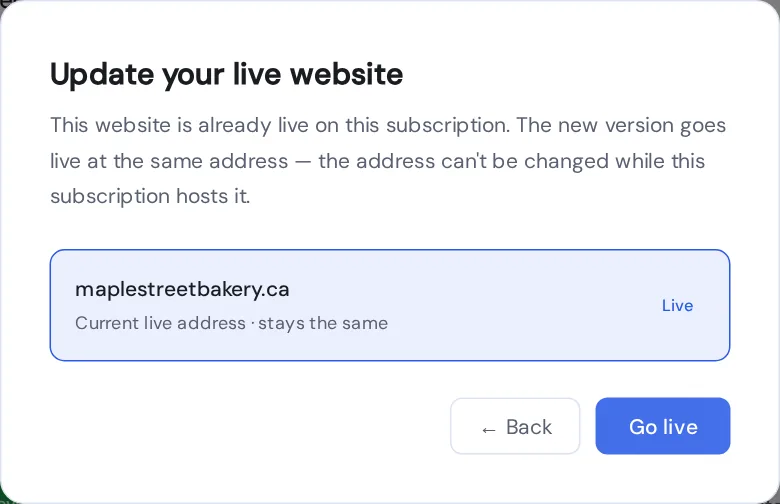
- When the preview is Preview ready, press Go Live and select the subscription marked Currently live.
- Press Next →, then Go live under Update your live website. The new version goes live at the same address.
Live at the preview's own address (no preview left)
- Press Clone to Preview on the live website and work on the copy.
- When the copy is ready, move the live website to Preview to free its plan, then Go Live with the copy.
Clone to Preview
Make a working copy of a live website. The live website stays exactly as it is.
- On Live websites, press Clone to Preview.
- Choose the copy's address (we suggest
name-copy); availability is checked as you type. - Press Create preview copy. The copy appears in Preview websites within a few minutes.
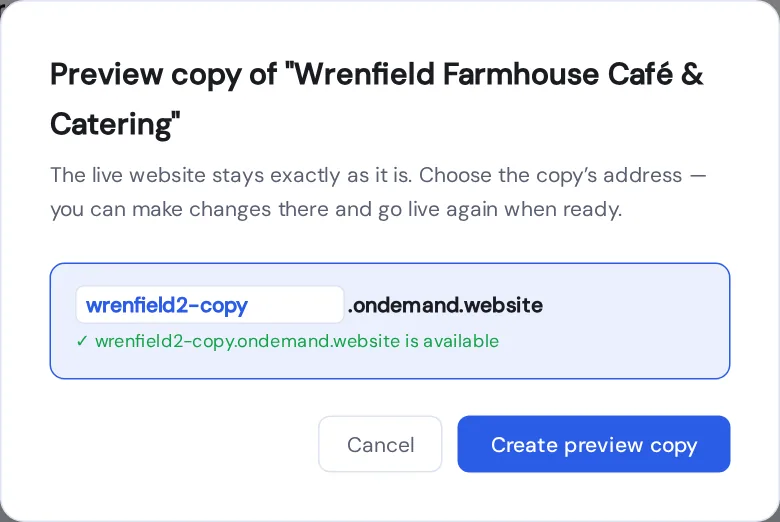
If you choose the address of one of your own previews, it is replaced after you confirm (Replace and continue).
Move to Preview
Take a website offline, free its plan for another website, or free its domain.
- On Live websites, press Move to Preview.
- Choose the preview's address. Keeping the website's own address replaces its current preview.
- Press Move to Preview.
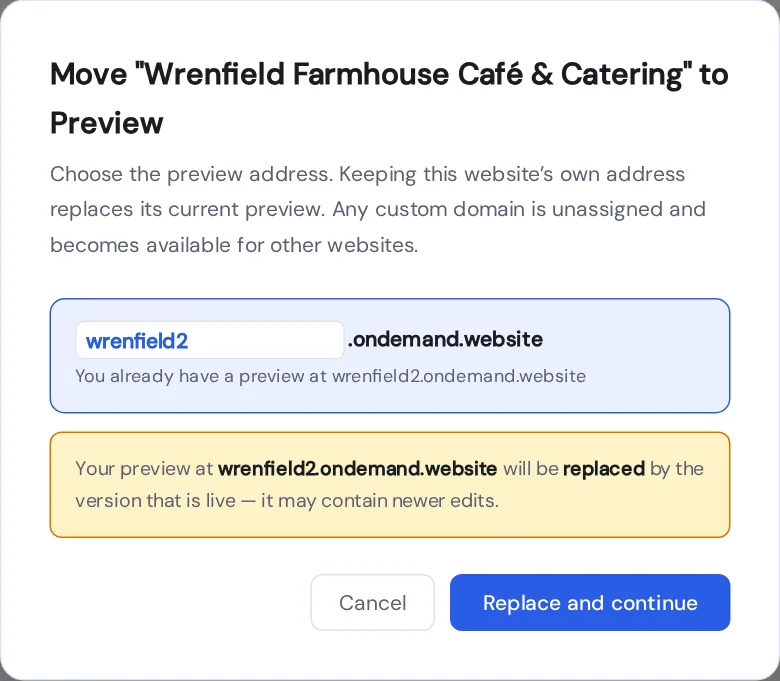
The live copies are taken down, the plan's slot is freed, and any domain is unassigned and becomes available for other websites. Your domain and its billing are kept.
Move a live website to another address or domain
A live website's address can't be changed in place.
- Move the website to Preview.
- Press Go Live again and choose the new address or domain.
To avoid time offline, clone it first and go live with the copy once the old one is moved.
Domains
Buy a domain
- Open Domains and press + Buy a domain.
- Type a name, pick extensions (.ca and .com are preselected; 20 are offered) and press Search.
- Next to an available name, choose the term (1, 3, 5 or 10 years) and press Buy. The renewal price is shown under it.
- Check Confirm purchase and press Purchase domain to pay on the secure checkout page.
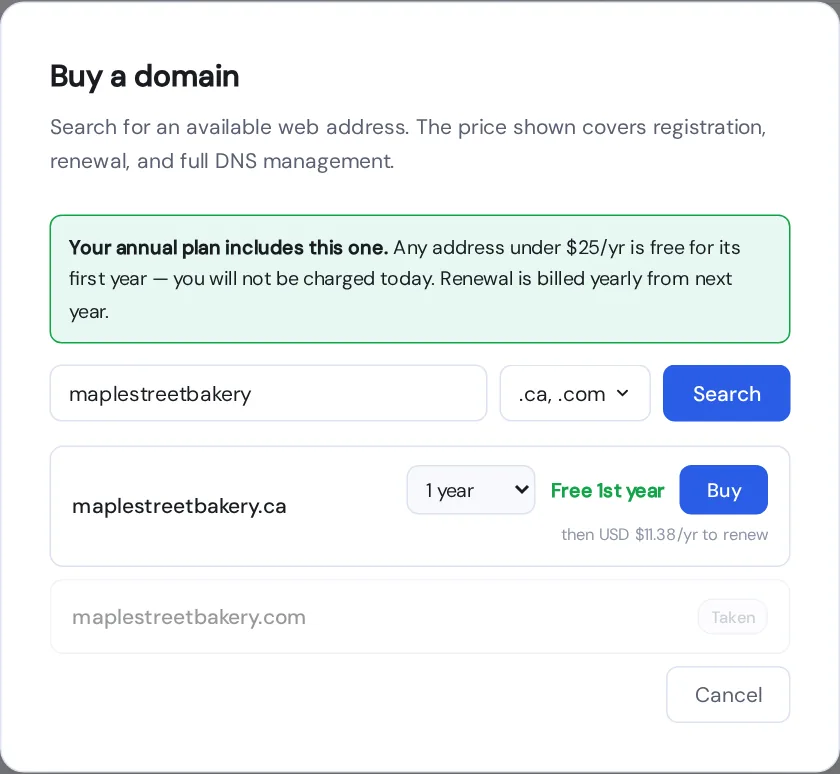
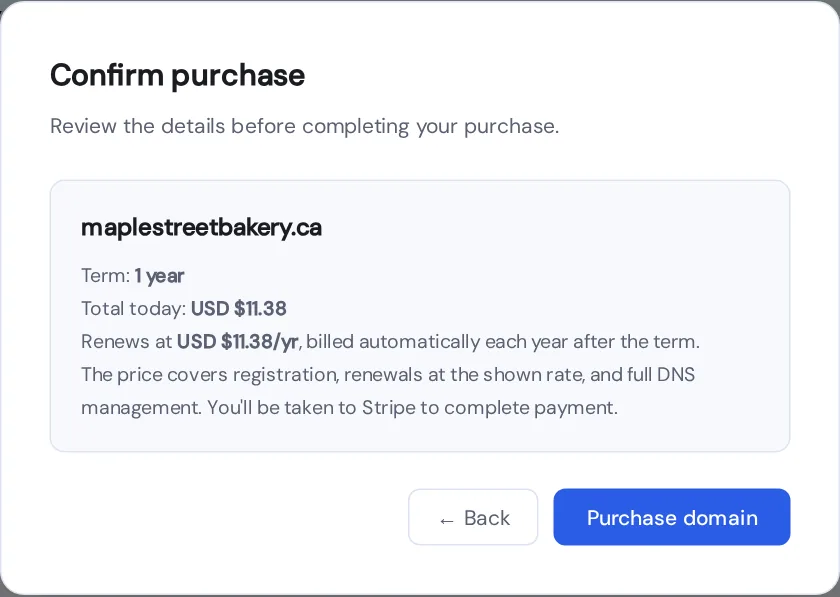
The domain appears under Domains as Registered, with automatic renewal on. Prices are in USD and cover registration, renewals at the shown rate and DNS management. Premium names are not offered. On an annual plan, one address up to $25/yr is included: its first registration is free, and renewals are billed at the normal price.
Transfer a domain to us
Move a domain from another registrar to your account. We then handle renewals and DNS.
- At your current registrar: unlock the domain, copy its EPP (authorization) code, and make sure you can receive mail at the admin email (turn off WHOIS privacy if needed). The domain must be more than 60 days past its registration or last transfer.
- On Domains, press Transfer a domain, enter the domain and the code, and press Start transfer.
- Pay on the checkout page; the exact USD amount is shown before you pay.
- Approve the transfer if your old registrar emails you. Transfers typically take 5–7 days and show Transfer in progress meanwhile.
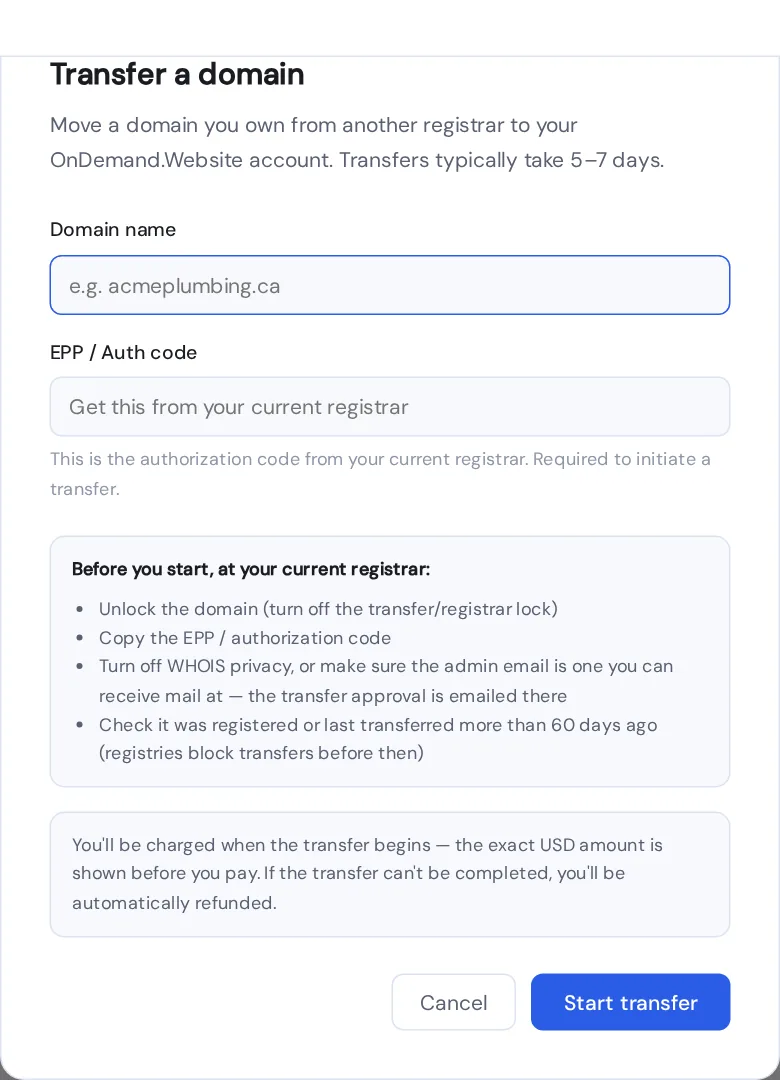
If the transfer can't be completed, you're refunded automatically. When it finishes, the domain shows Registered and renews yearly at the renewal price.
Connect a domain you keep elsewhere
Keep the domain and its DNS where they are and point it at your website. Free.
Before you start
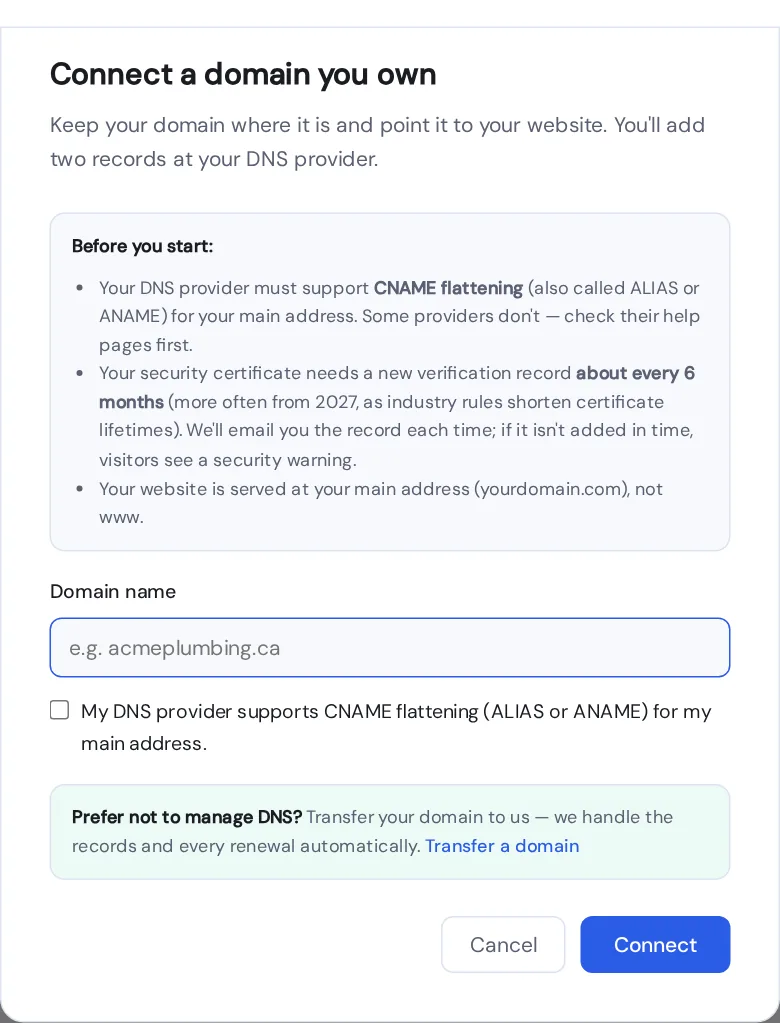
- Your DNS provider must support CNAME flattening (also called ALIAS or ANAME) for your main address. Check their help pages.
- About every 6 months you'll add a new verification record for the security certificate; we email it to you. From 2027 this becomes more frequent, as industry rules shorten certificate lifetimes.
- Your website is served at your main address (
yourdomain.com), not www, and subdomains such asshop.yourdomain.comcan't be connected. - You need an active plan before you connect, and each plan can have one connected domain.
- On Domains, press Connect a domain you own.
- Enter the domain, tick that your DNS provider supports CNAME flattening, and press Connect.
- Add record 1, the verification record, at your DNS provider: type
TXT, host_dnsauth, and the value shown (use Copy). If a_dnsauthrecord already exists, replace its value. - Press Check now. Verification usually takes minutes to a few hours; it must happen within 7 days. The domain then shows Registered with Verified. Choose it as the address when you Go Live.
- Go Live with it, then add record 2, the address record: type ALIAS / ANAME (CNAME flattening), host
@, value shown. If your provider has a proxy (for example Cloudflare's orange cloud), choose DNS only.
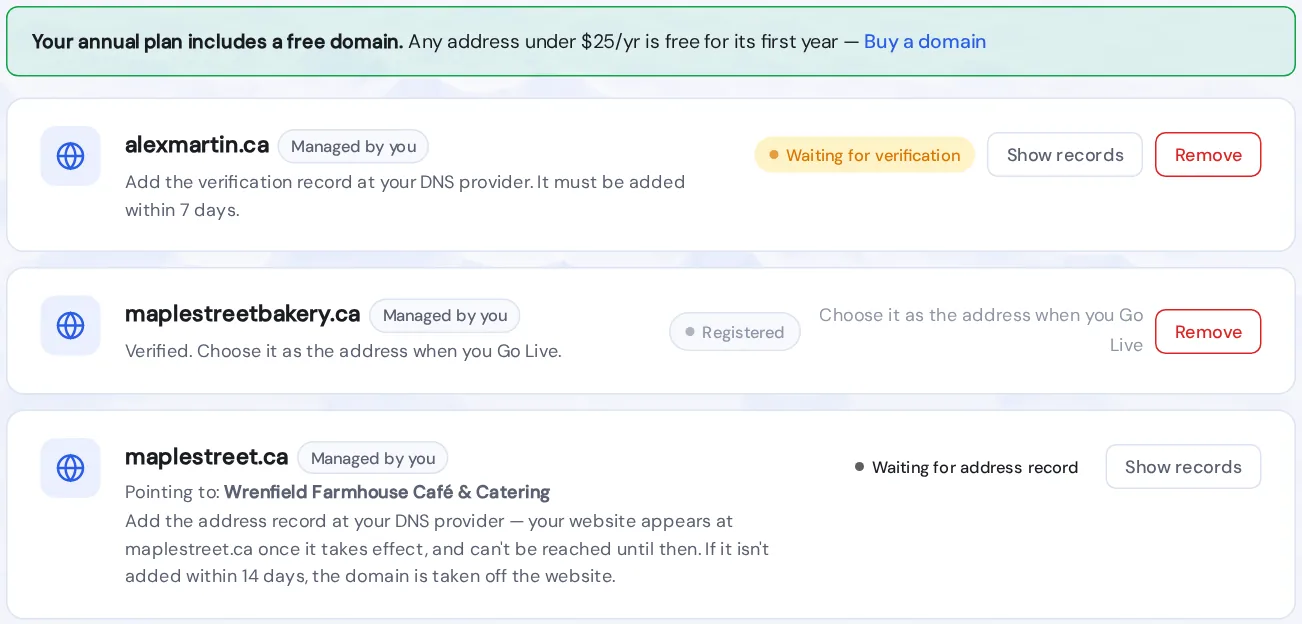
Find the records any time with Show records on the domain. Limits: one domain waiting for verification at a time, 3 connects a week. A verified domain not used by a website for 30 days is removed.
Turn auto-renewal on or off
Domains you buy renew automatically each year: the renewal is charged 3 days before the domain expires.
- On the domain's card, press Turn off auto-renewal and confirm with Turn off renewal. Billing stops now; the domain stays yours until its date, then expires and could be registered by someone else.
- To turn it back on, press Turn on auto-renewal. If billing has to be set up again, you're taken to the checkout page; you're charged 3 days before the domain expires (at once, if that is sooner). An expired domain can't be switched back on: see Re-purchase.
With auto-renewal off, we email you 60, 30 and 7 days before the domain expires.
Renew an expired domain (Re-purchase)
| Card shows | What to do |
|---|---|
| Expired | Press Re-purchase: one year at the normal renewal price, charged now and renewed now, with auto-renewal back on. Available for about 25 days after expiry. Your website comes back at the domain once it is renewed. |
| Expired — restore period | The registry can still restore it for a restore fee: press Contact support. |
| Released by the registry | The domain is no longer yours and was taken off your website. If it is still available, Re-purchase buys it again. |
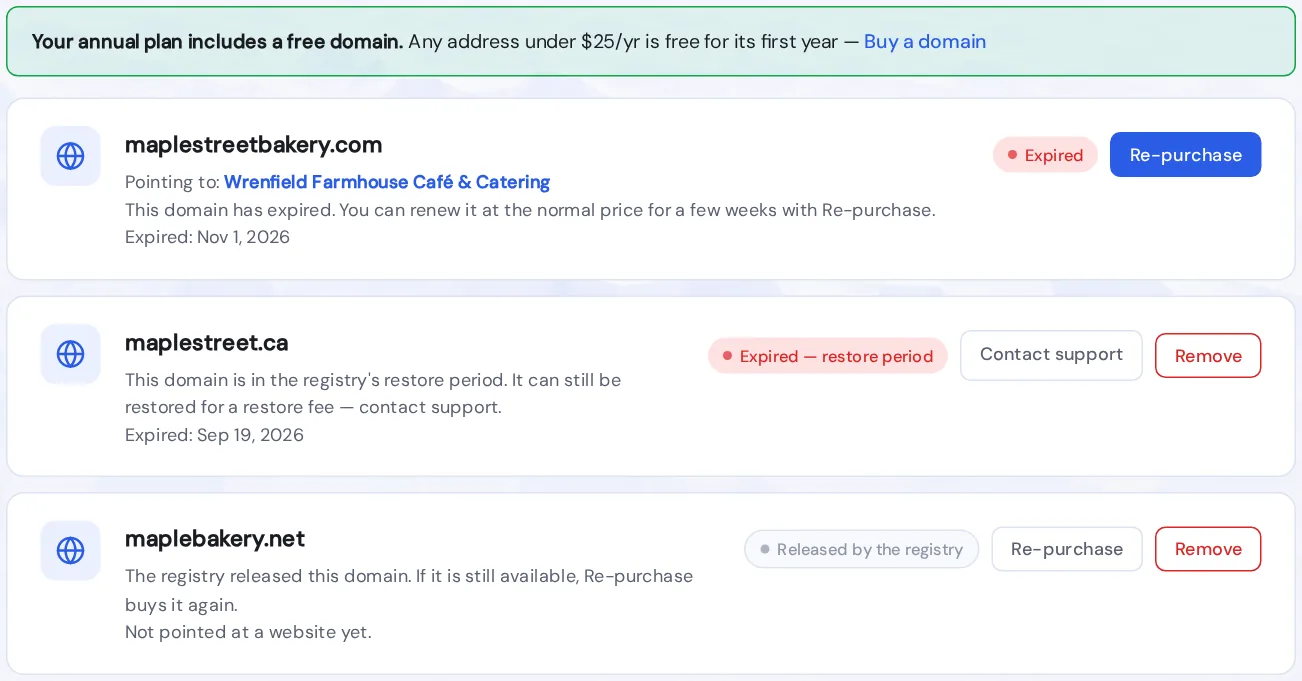
While a domain is expired, your website can't be reached at it. A website whose domain is released stays reachable at its ondemand.website address, if it has one, while your plan is active.
Unassign or remove a domain
- Unassign stops the domain pointing at a website (not live) and returns it to your available domains. You keep the domain.
- Remove deletes the domain from your account: renewal billing stops now, and the domain stays registered until its paid term ends, then expires. This cannot be undone.
- A domain on a live website can't be unassigned or removed. Move the website to Preview first; the domain is then freed automatically.
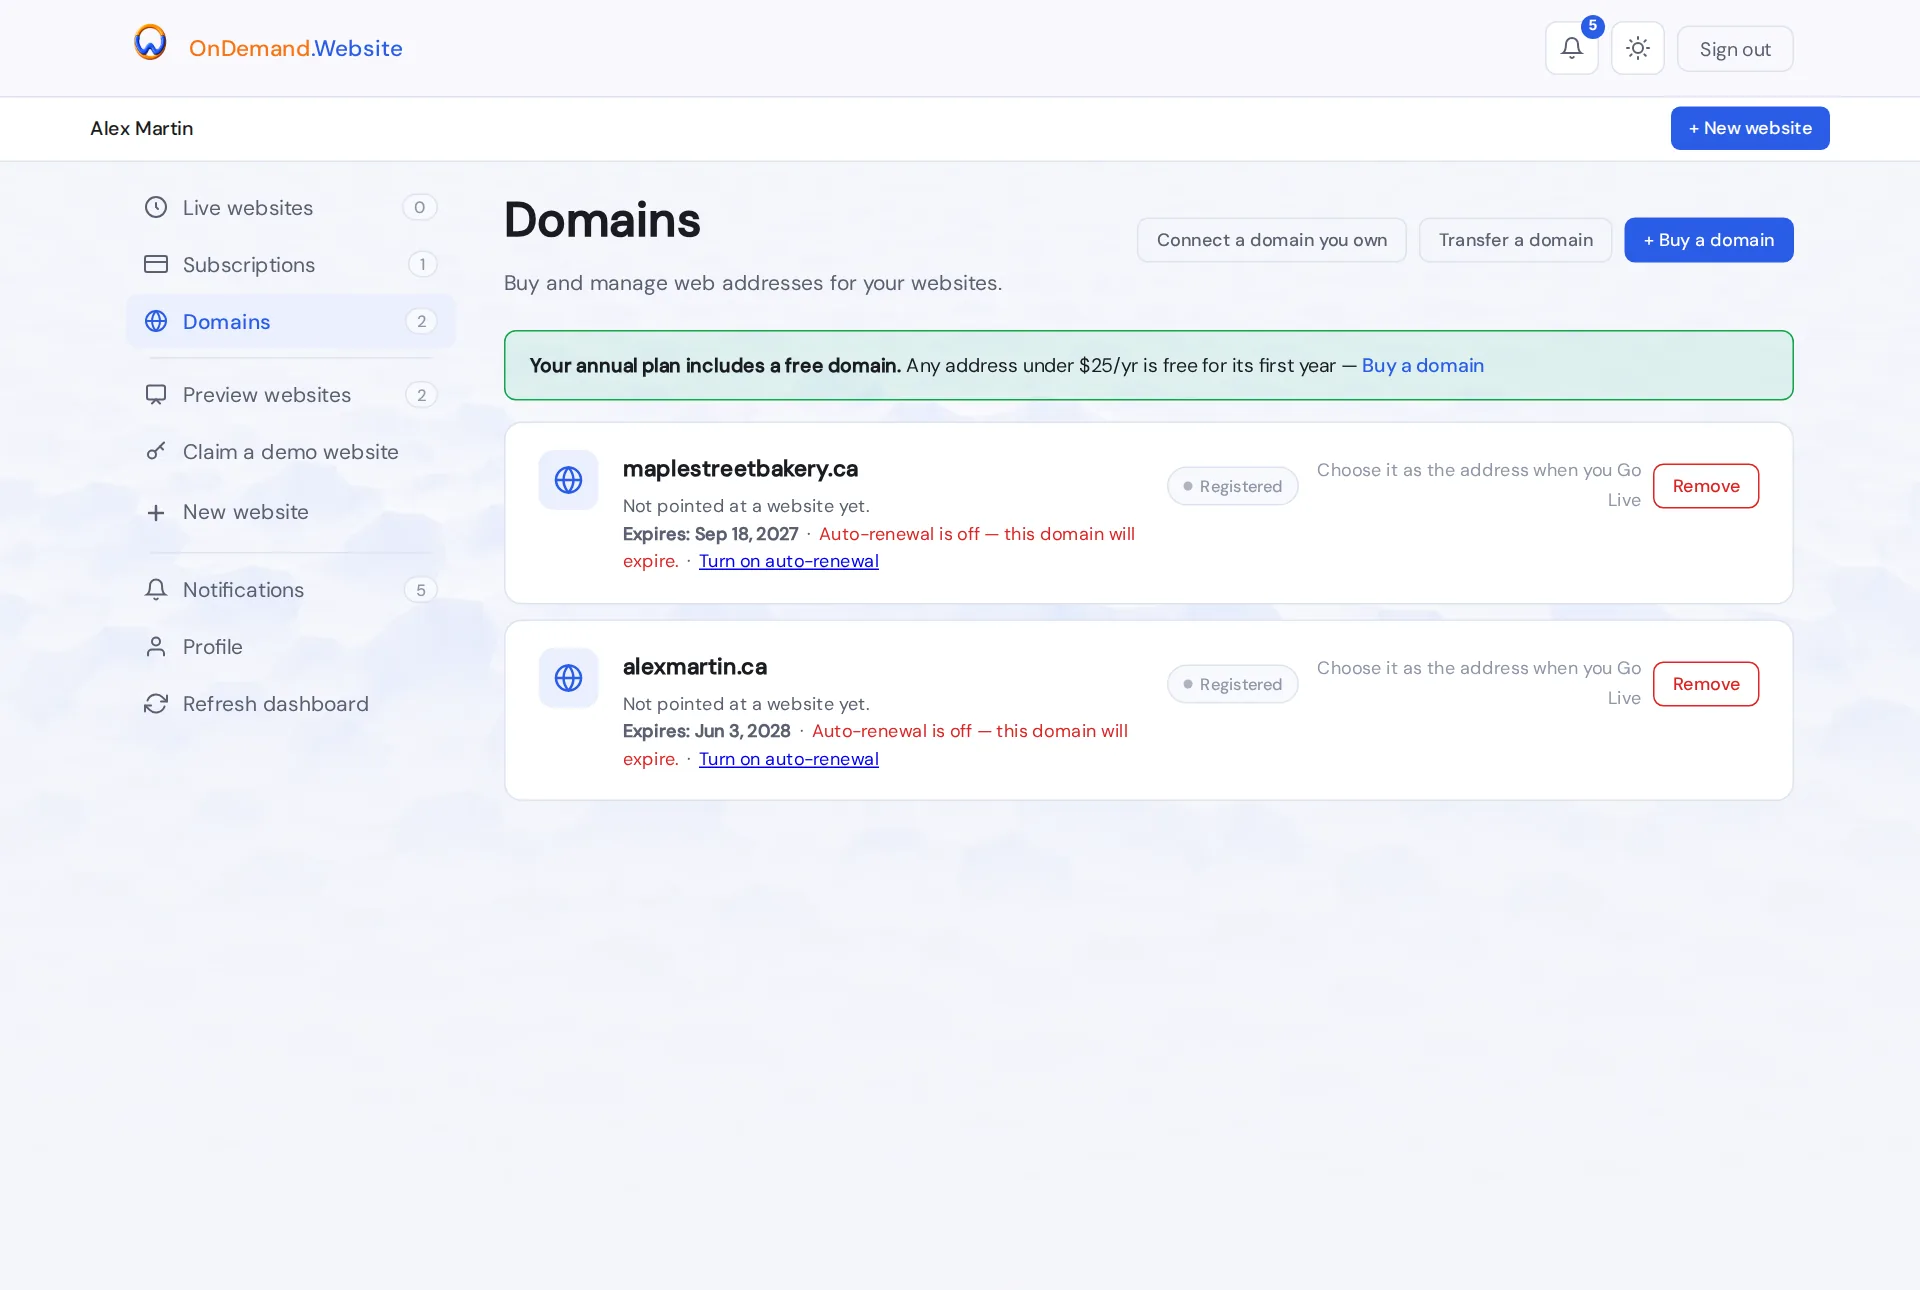

What each domain status means
| Status | Meaning |
|---|---|
| Registered | Yours and not used by a website. Choose it when you Go Live. |
| Waiting for verification | A connected domain: add the verification record within 7 days. |
| Setting up | DNS, certificate and routing are being configured; usually within the hour. |
| Waiting for address record | A connected domain after Go Live: add the address record. |
| DNS propagating | DNS changes are spreading; it may take up to 48 hours. |
| Live | Your website is served at this domain. |
| Transfer in progress | Typically 5–7 days. |
| Verifying registration | We are confirming the registration. |
| Setup issue / DNS delayed — under review | Taking longer than expected; our team has been told and will finish it. |
| Transfer delayed — under review | The transfer is taking longer than expected. |
| Registration failed — refunded / Transfer failed — refunded | It couldn't be completed and you were refunded. Remove the entry. |
| Renewal payment failed | The charge is retried. To change the card used for domain renewals, email support@ondemand.website. |
| Renewal issue — under review | The renewal couldn't be completed; our team has been told. |
| Registration failed / Registration payment failed / Transfer payment failed | It didn't go through. Remove the entry and try again, or contact support. |
| Cancelled | The domain or its renewal was cancelled. Remove the entry, or turn auto-renewal back on if offered. |
| Expired / Expired — restore period / Released by the registry | See Renew an expired domain. |
| Disconnecting / Removing | Being taken off a website or out of your account. |
Account and billing
Manage billing: card, invoices, cancelling
- Open Subscriptions and press a plan to expand it: plan, billing, renewal date, live website and included domain.
- Press Manage billing to open the secure billing portal for your plans.
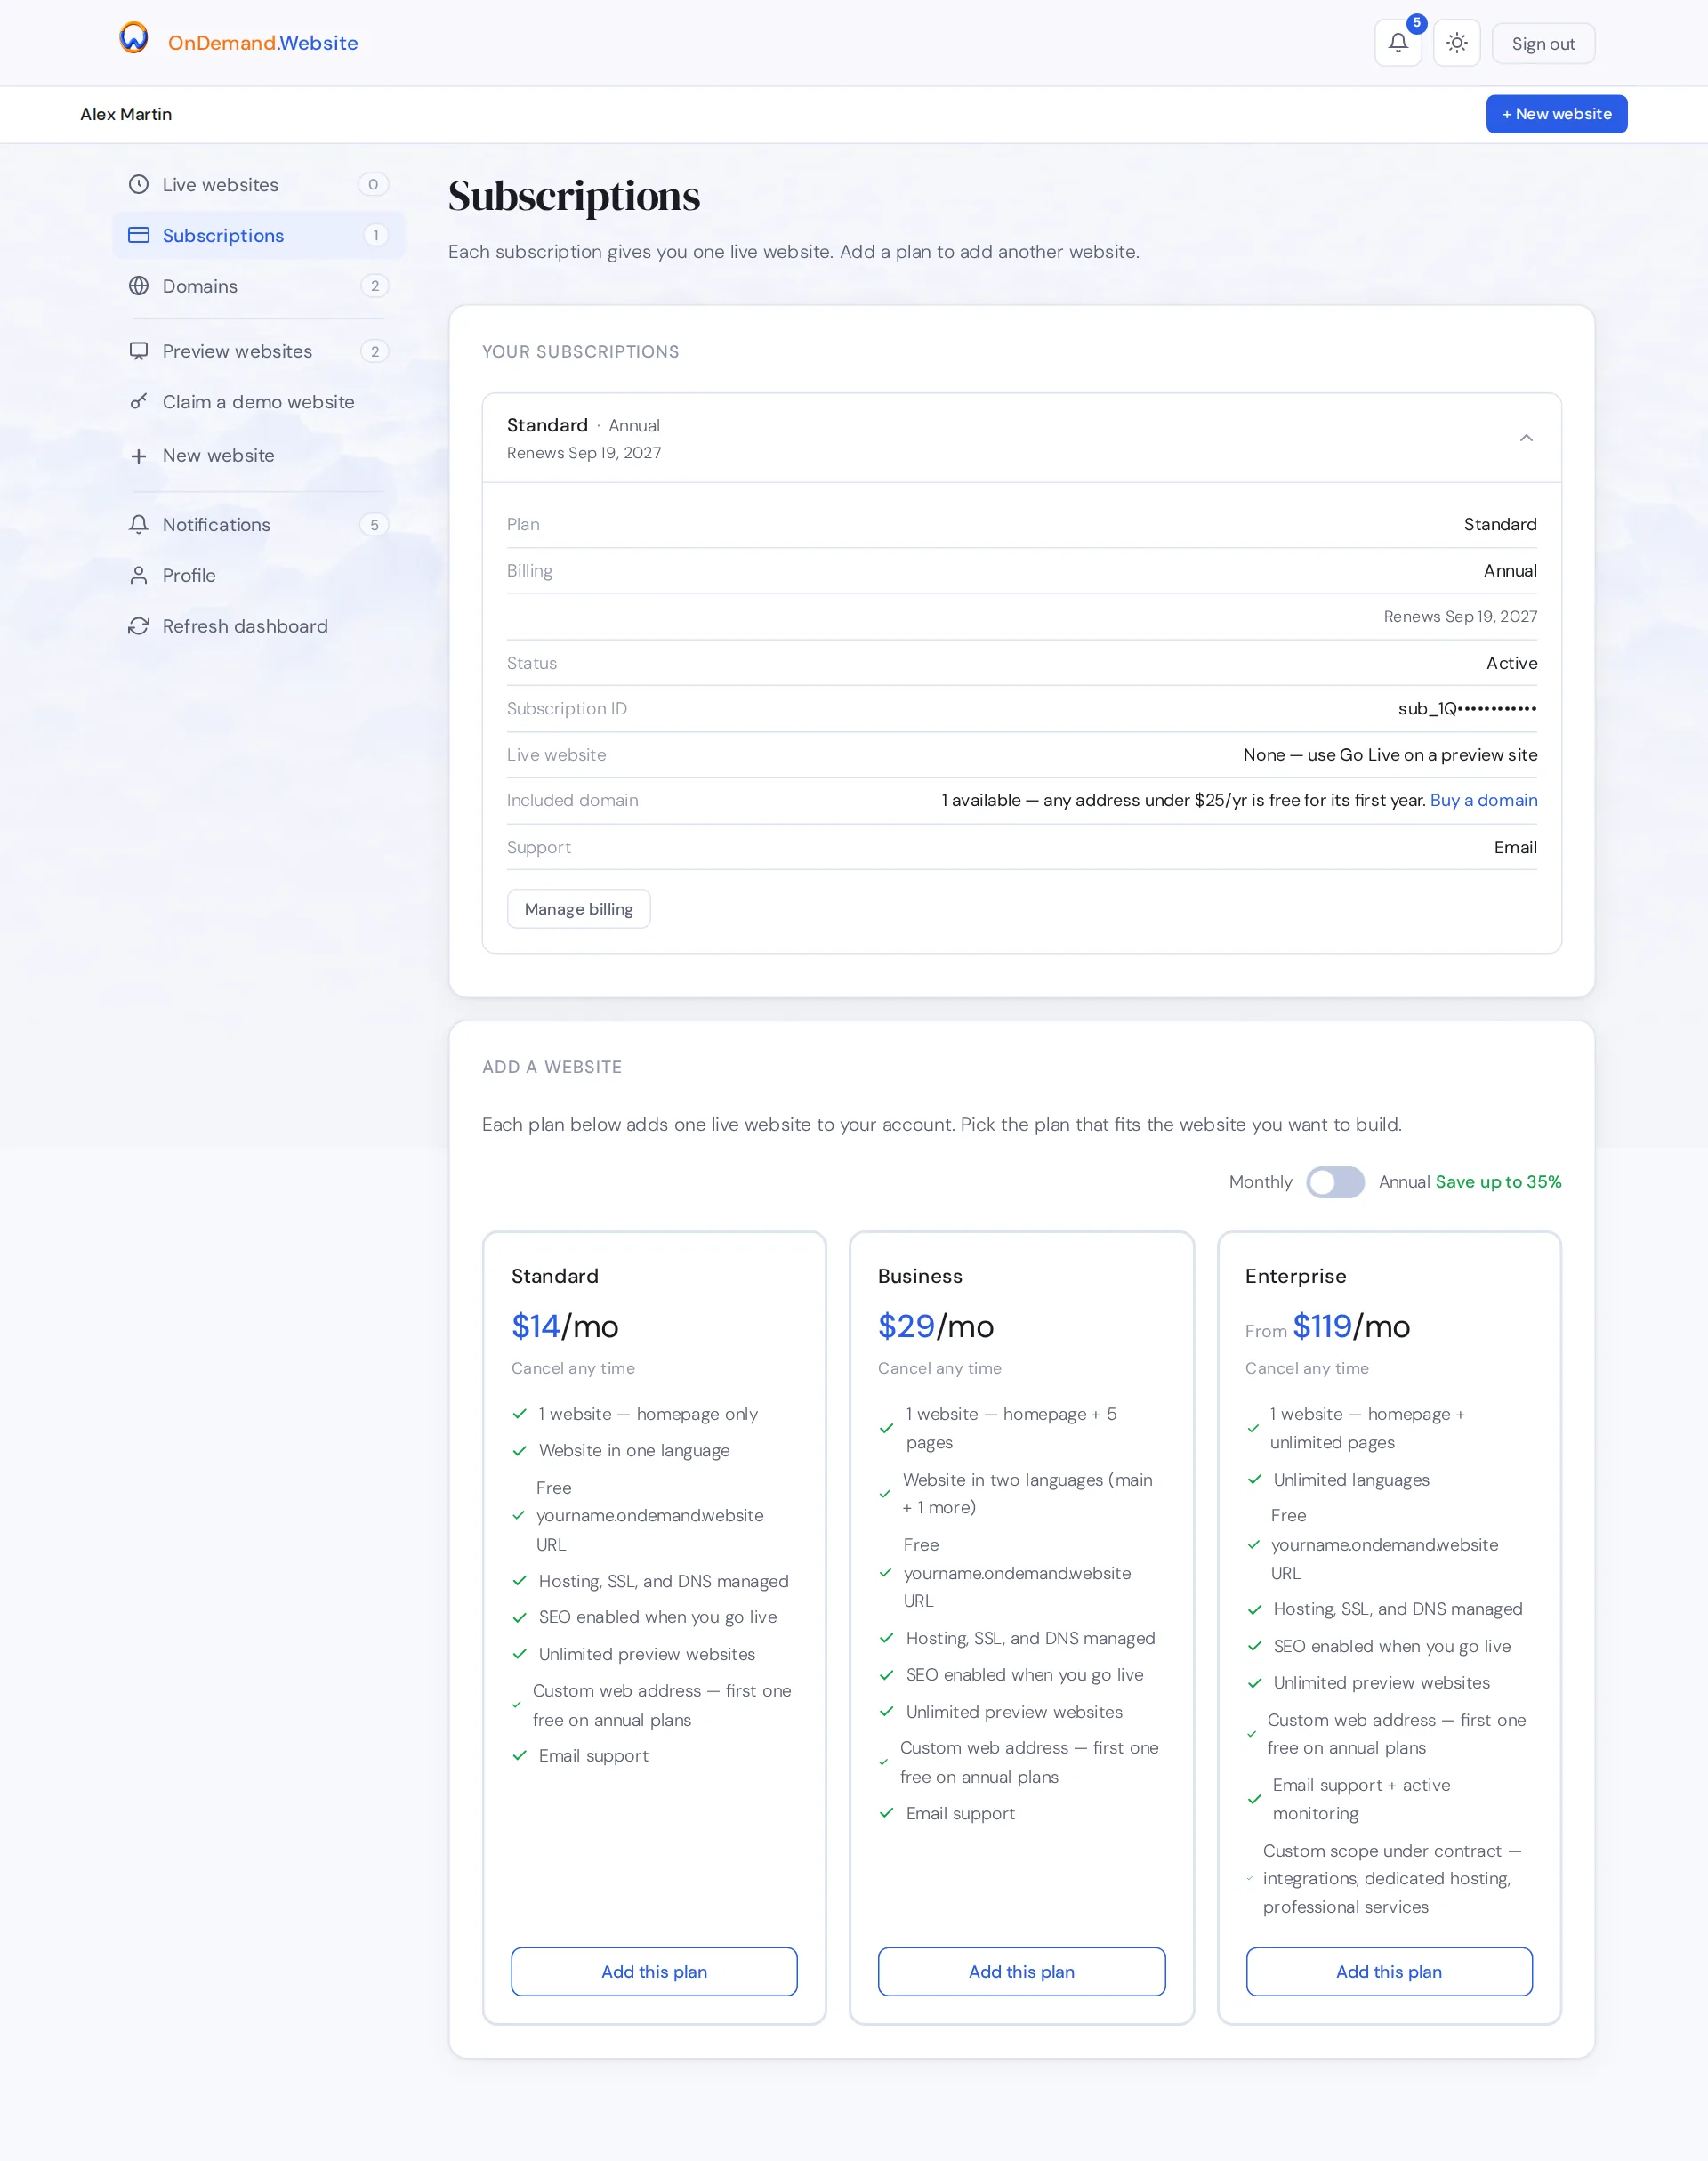
A plan set to end shows Cancels and the date; until then nothing changes, and we email you in its last 7 days. When the plan ends, the website returns to your previews (nothing is deleted), the plan's slot is freed, and its domain is unassigned; you keep the domain. If a plan payment fails, we email you; your website stays live while the payment is retried.
Add another website
- Start it with New website; previews are free and unlimited.
- To publish it too, add another plan under Subscriptions (Add this plan): each plan hosts one live website.
- Go Live and select the new plan's Slot available.
Edit your profile
- Open Profile and press Edit.
- Change your name, email or phone. A new email or phone is checked with a code we send to it.
- Press Save changes.
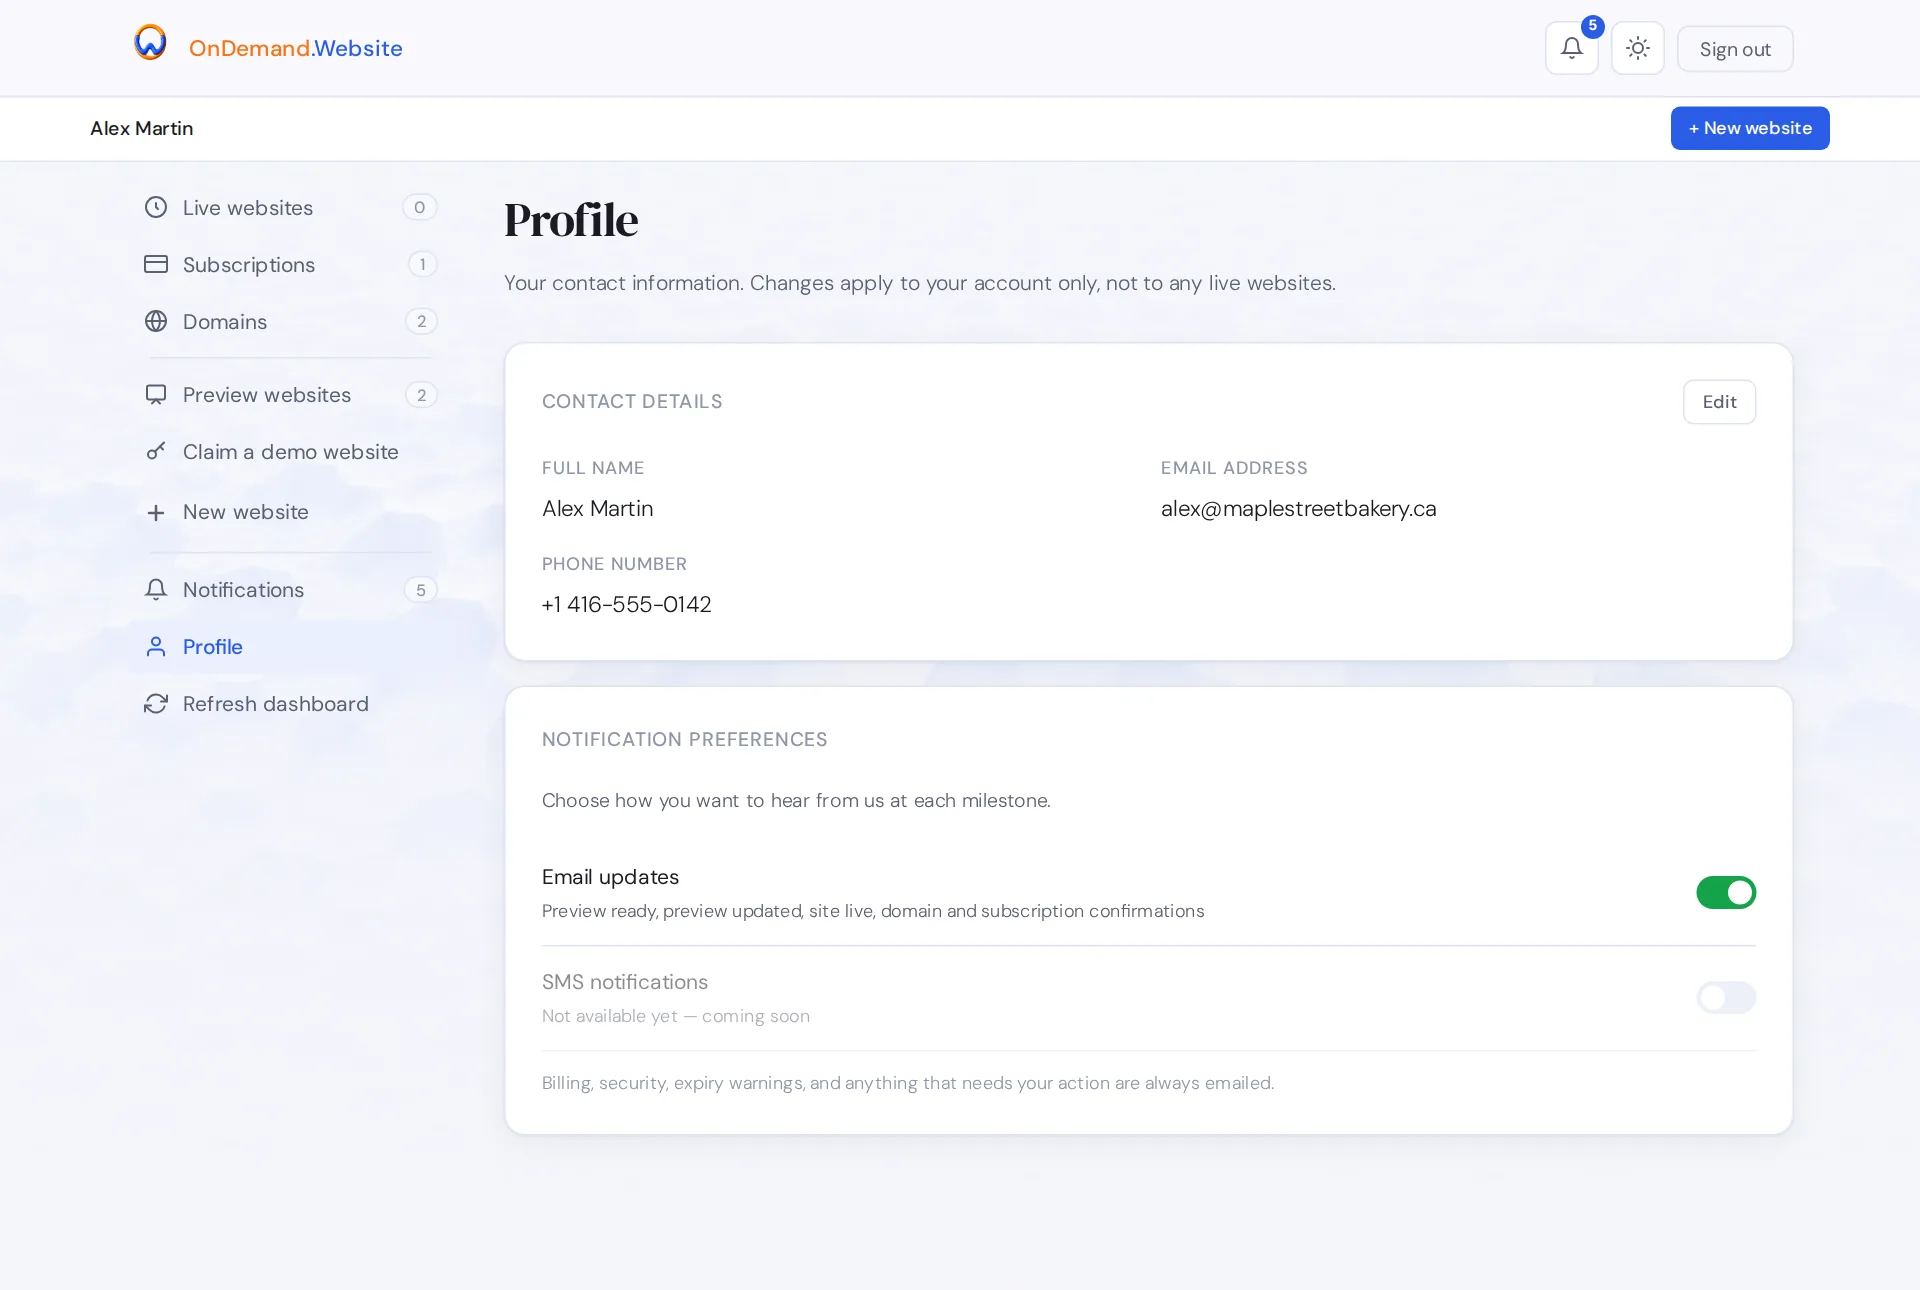
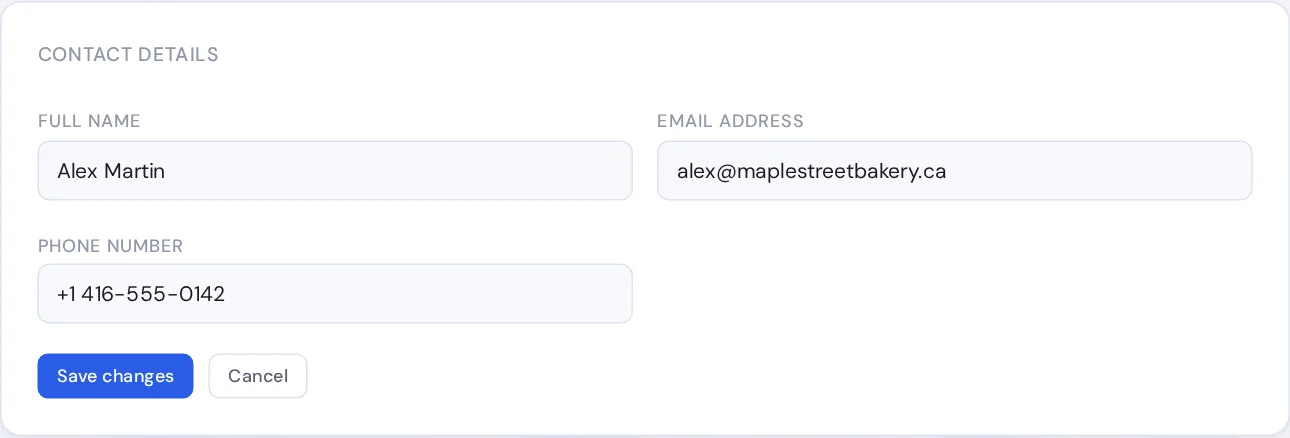
These are your account details; they don't change your websites. To change what a website shows, request a change.
Notifications and email preferences
Notifications lists everything happening on your account; the bell shows new items. Under Profile, Email updates turns off the routine emails: preview ready, preview updated, site live, domain and subscription confirmations. Billing, security, expiry warnings and anything that needs your action are always emailed.
Still stuck?
See the F.A.Q, or email support@ondemand.website.